
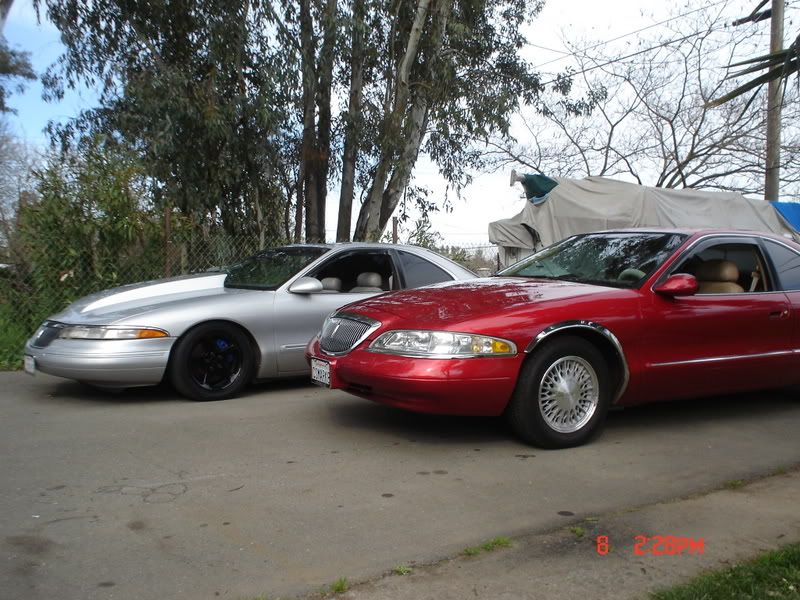
Hey guys, Bob(previous owner of my 95, aka dbobo) came by my place today for a Diff service and to get a "rebuilt" drive shaft installed into his 98 Base so I thought I'd take tons of pics and give you guys a write up on the job(s). Here it goes........
First off, the shaft came out of Max's 98 Base and has low miles on it(Max got a MMX shaft), so I sent it out to the local shaft shop, DriveLine Services, and had it gone through. They replaced both u-joints, straightend and balanced it(15k rpms). The shop can also replace/rebuild the rubber inserts if there is any vibrations. The repair to Bobs new shaft was $94 bucks delivered with a 24hr turn around.
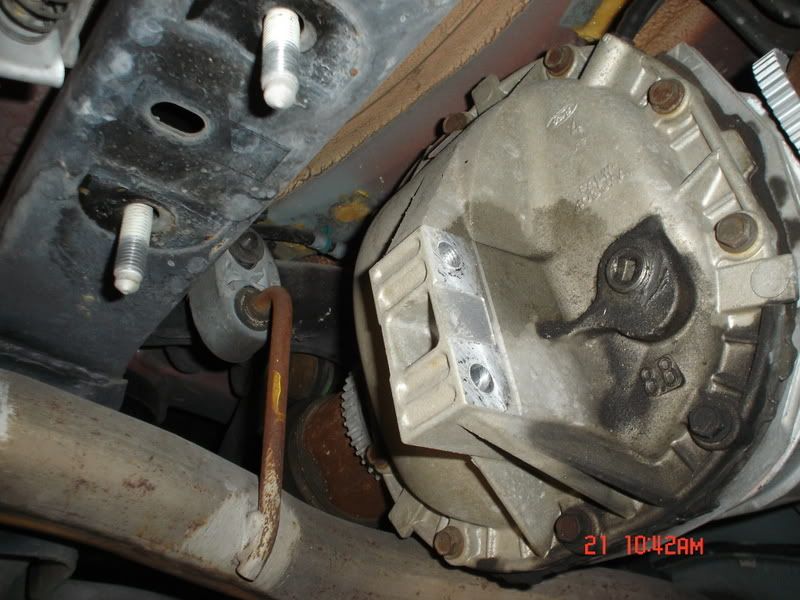
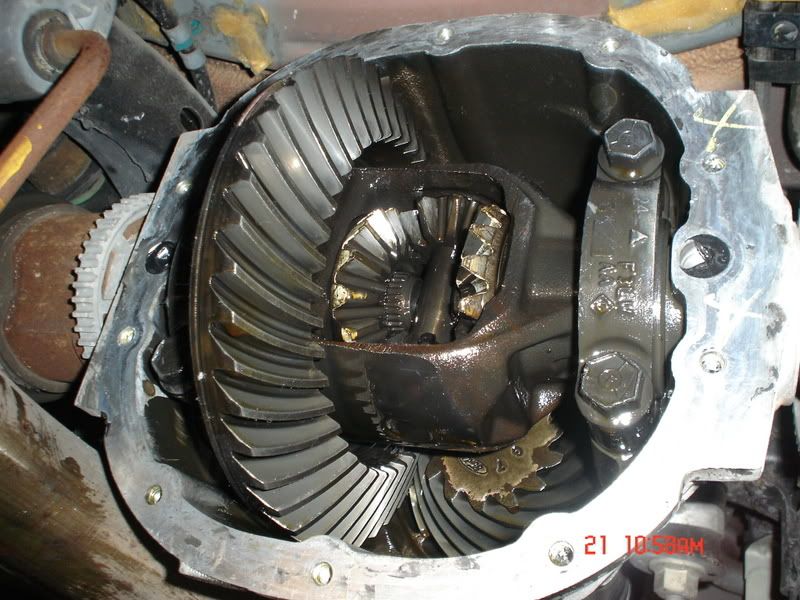
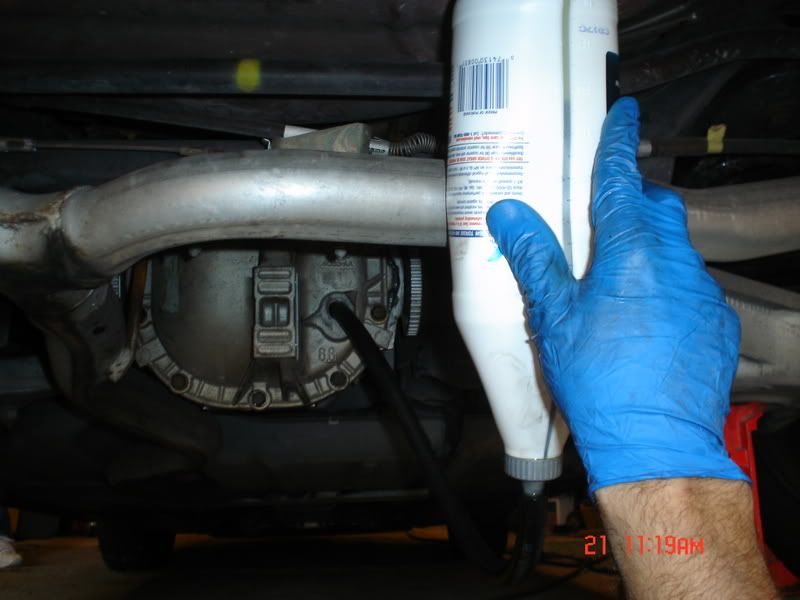
Next, the 98 has 87k on it and the diff. hasn't ever been serviced as far as he knows so I figured I'm right there so its time for a service.
A standard swap WITH air tools should take the average at home mechanic NO MORE than 2 hours, I did it in just about 1...maybe a little less.(Note times of pictures, I did the shaft first, and than started the diff service)
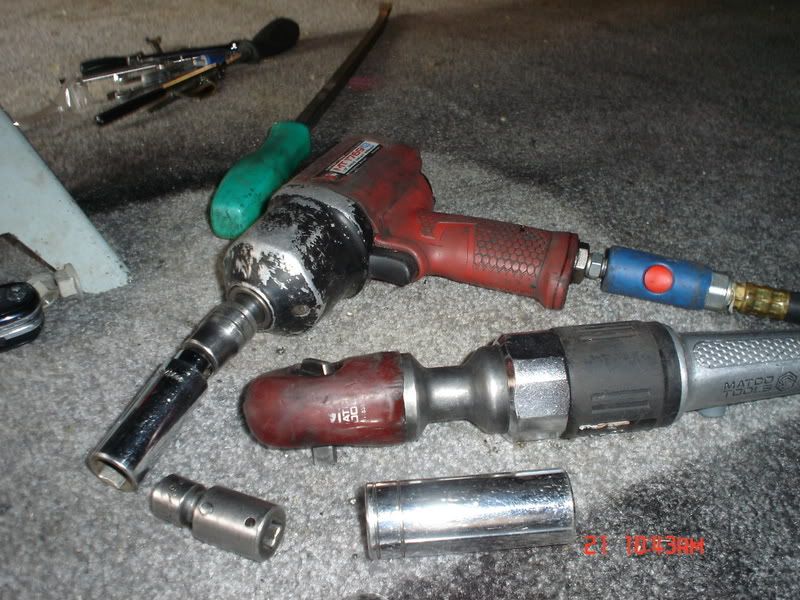
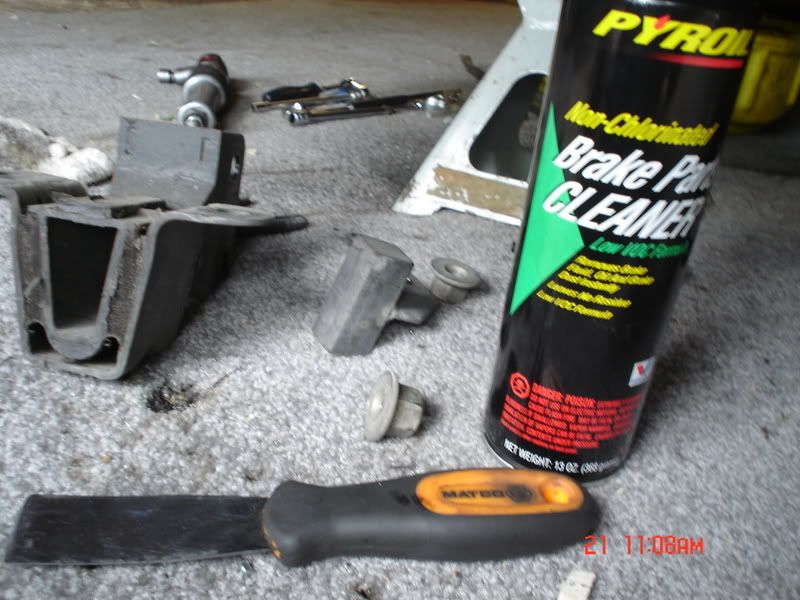
Here are the tools you'll need for the drive shaft swap....

Air Impact Gun(or equivalent hand Ratchet)
12" 3/8" extention
13MM Wobbly Socket
Long Flat Head Screw Driver
Long Pry Bar(29")
1/4" Ratchet and 5/32" socket w/6" extention for fuel tank hose clamps(or small flat tip screw driver if you can get to them)
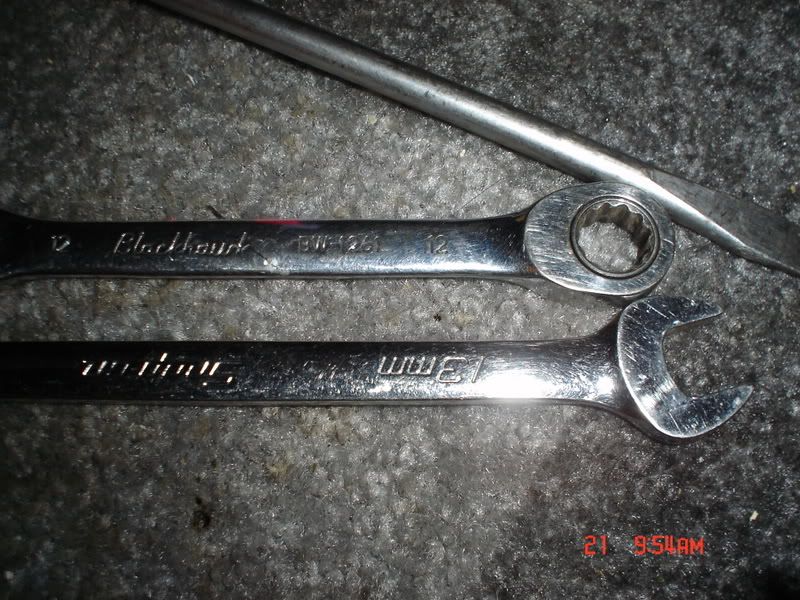
12MM 12 POINT Ratchet Wrench
13MM or bigger Open end Wrench for double wrench leverage technique(DWLT, lol, I'm making up sh*t now)
Marker or equivalent for making shaft for alignment
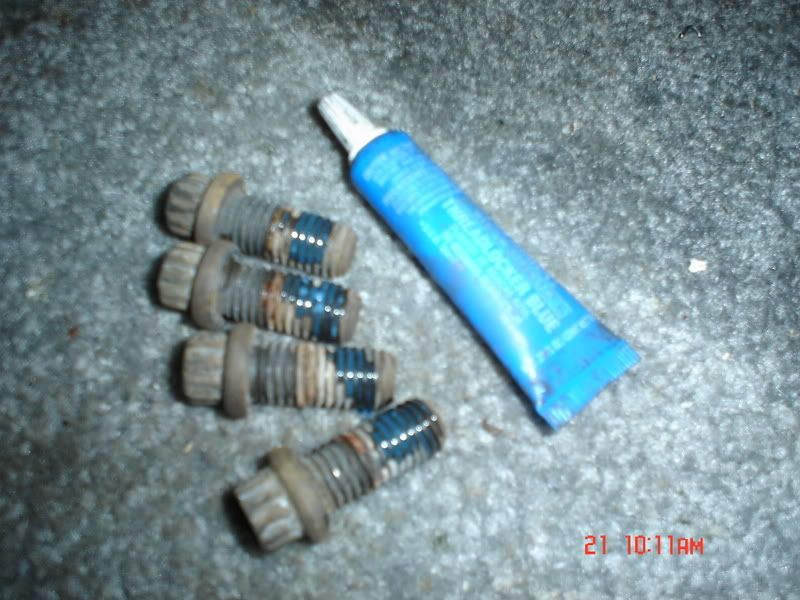
Lock Tite for drive shaft to pinion flange bolts
Last but not least...safety glasses to prevent this..........

Or this...........LMAO

Ok.....start by jacking the back of the vehicle up as high as safely possible and place jack stands underneath and rest the weight of the vehicle on the stands. Remove the jack for later use to support the fuel tank. I placed the jack stands on the lower control arms because my stands sit snugly inside the drain holes where the stock air springs sit. Make sure if your car still has the factory air, you turn OFF the air ride switch IN the trunk. Bobs car was converted(by me).
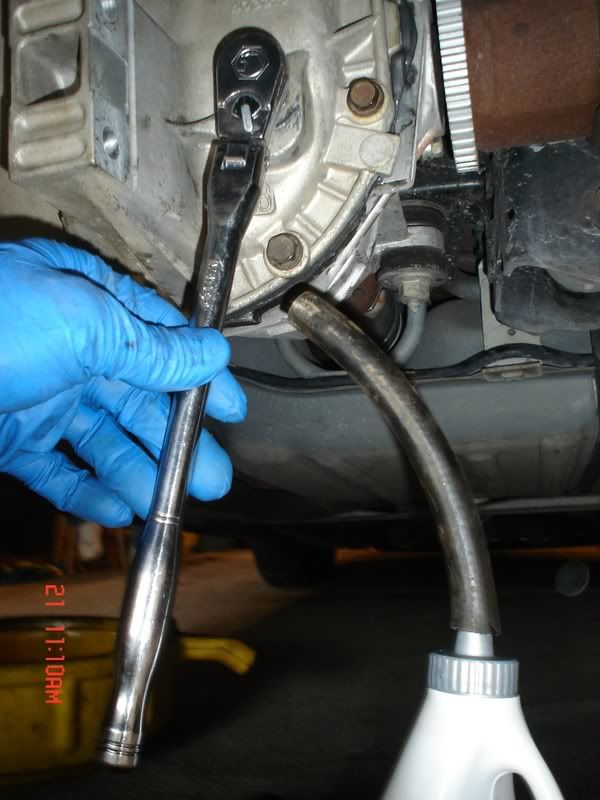
Next you'll want to remove the drive shaft bolts using the 12mm 12 POINT Ratchet Wrench with the 13mm open end, using the double wrench method.
You may have to release the parking brake and place the car in Neutral to spin the driveshaft, you can also use the long flat head screwdriver to stop the driveshaft from spinning by placing it in the u-joint. I was able to get access to all the bolts without turning the shaft.

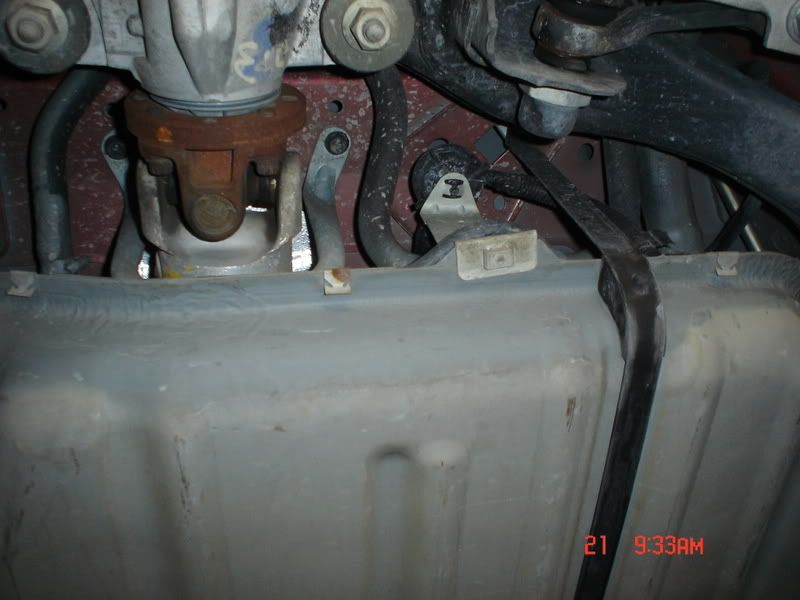
Once you've removed all the shaft bolts, the next step is to remove the fuel tank straps(different than pictured above but easier to remove the shaft bolts with the tank up). Start by removing the rear(of the tank/car) 13mm strap bolts using the impact gun with the 13mm wobbly socket and 12" extention. The tank won't fall to much so no worries.
Passenger Side Strap
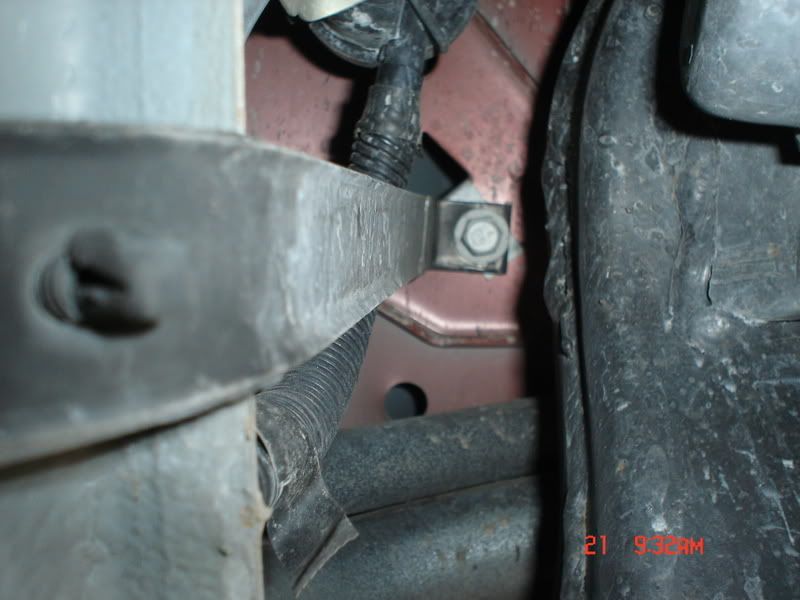
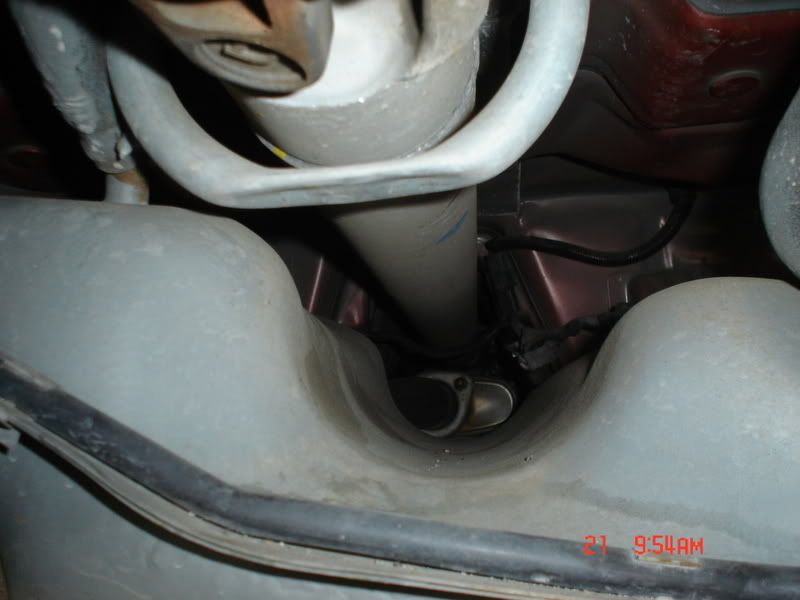
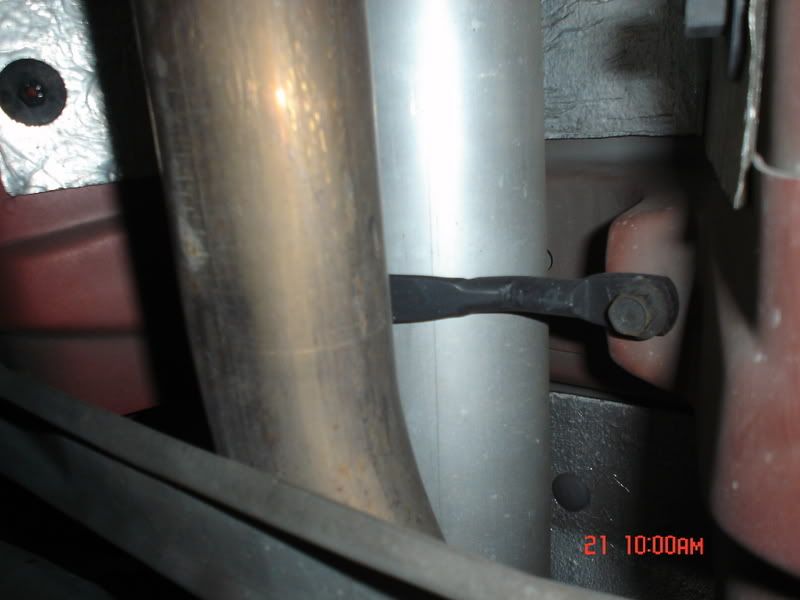
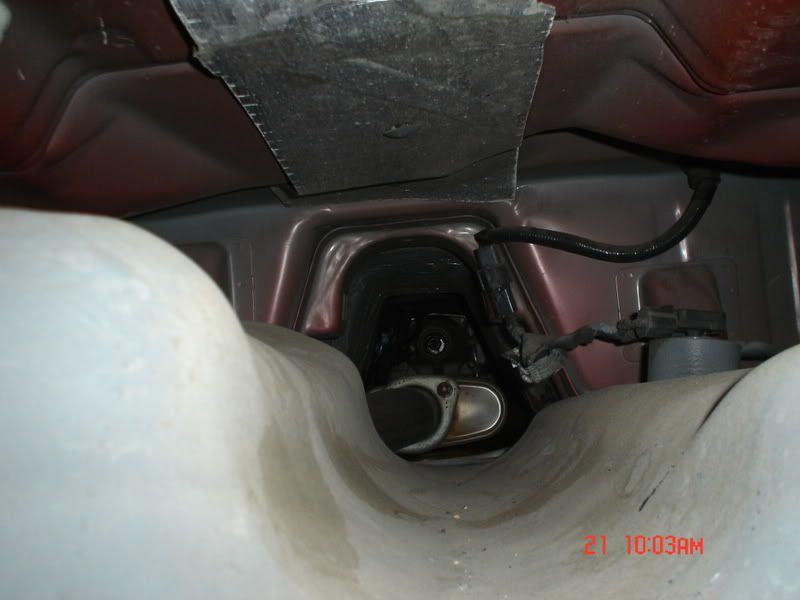
Drivers Side Strap(notice the exhaust pipe at the bottom right)
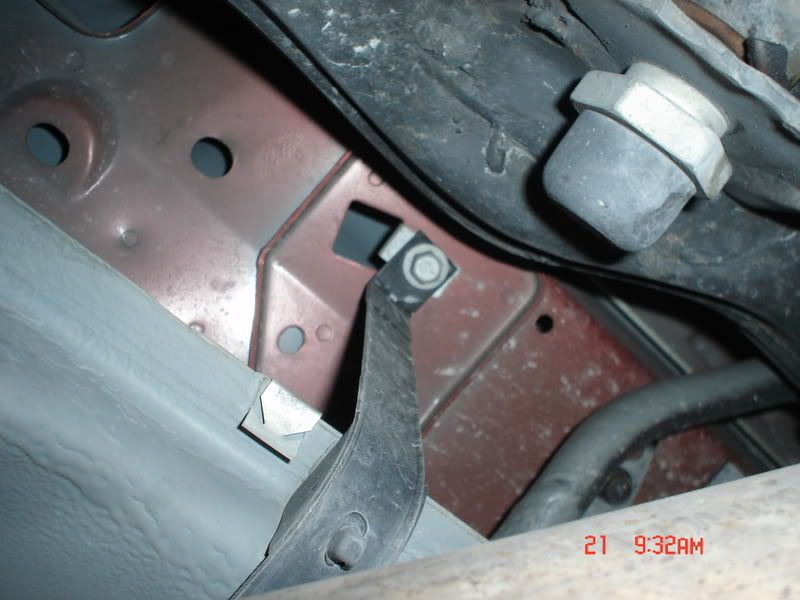
*******These next steps were required on Bobs, but NOT on my 95, nor Max's 98. I was able to remove the shaft on both of our cars without removing BOTH straps completely. I would suggest seeing how much movement you get when remove just the back(of the car) bolts/straps on the tank. The back of our tanks rested on the exhaust and with some cohersing our shafts came out, it was tight, but saved a HUGE amount of time, IMHO.********
Next you'll want to place the jack underneath the middle of the gas tank and raise it so it slightly puts pressure on it. Now remove the front(of the car) 13mm strap bolts and move them out of the way.
With the weight of the tank now on the jack, you'll want to loosen the hose clamps on the fuel filler tube(both fill/vent hoses) and remove both hoses. I used a long pry bar for leverage to remove the hoses.
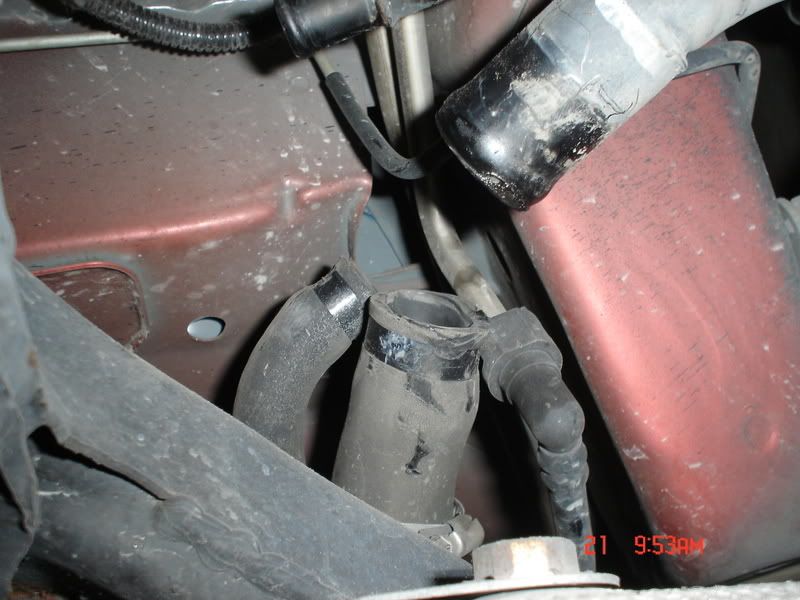
Next you lower the jack and the fuel tank down about 6-8" which is plenty to remove the shaft. Make sure if you have a FULL tank, that you don't go so low as to dump gas out of the fill/vent tubes.
******continued if you didn't have to remove ALL the straps and extra steps needed to lower the tank more.********
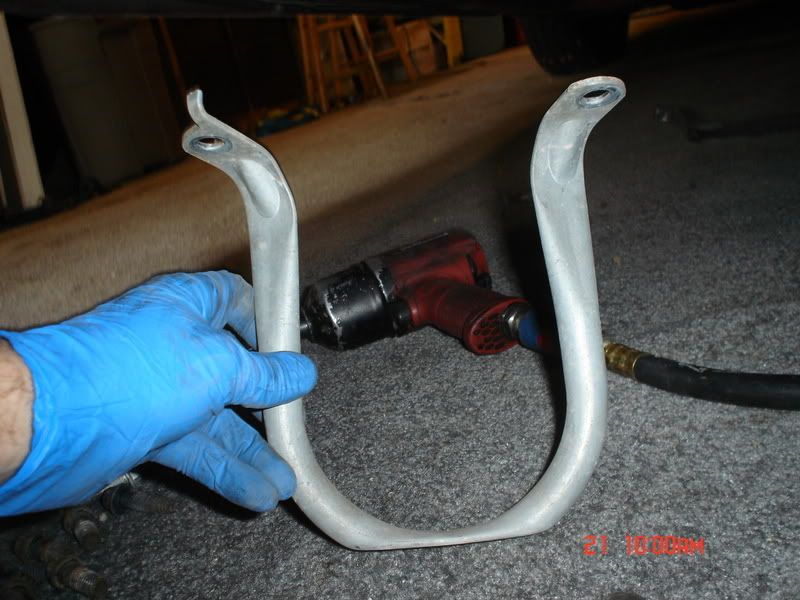
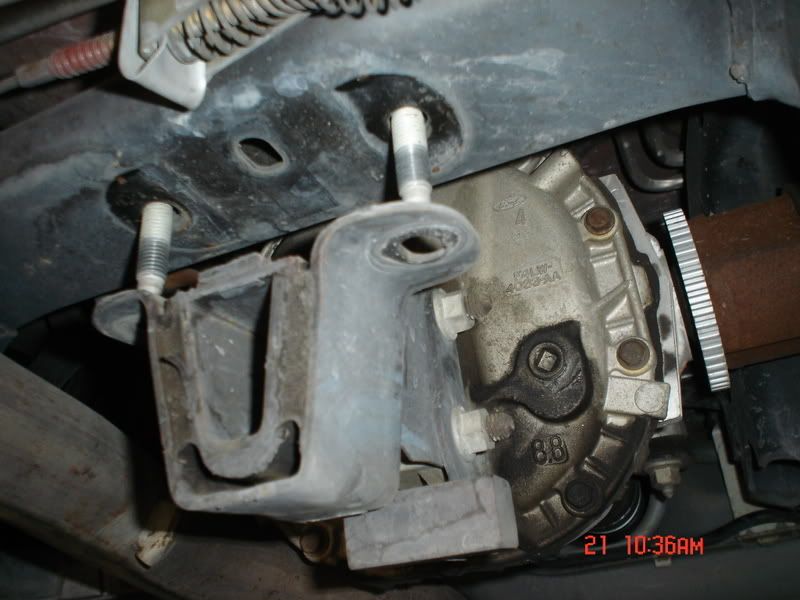
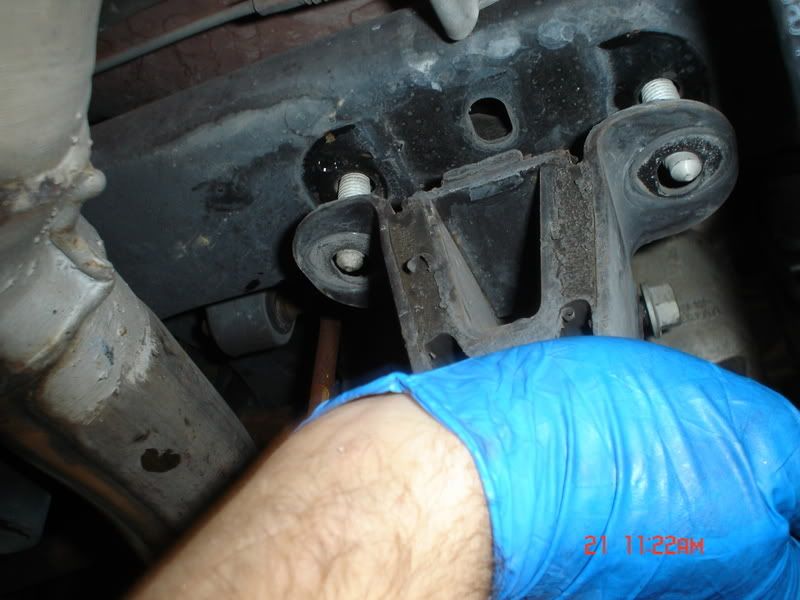
Now that the tank is lowered out of the way, you'll want to remove the middle drive shaft "loop" just in front of the gas tank. Also 13mm bolts so use the 13mm wobble/extention/air gun setup.
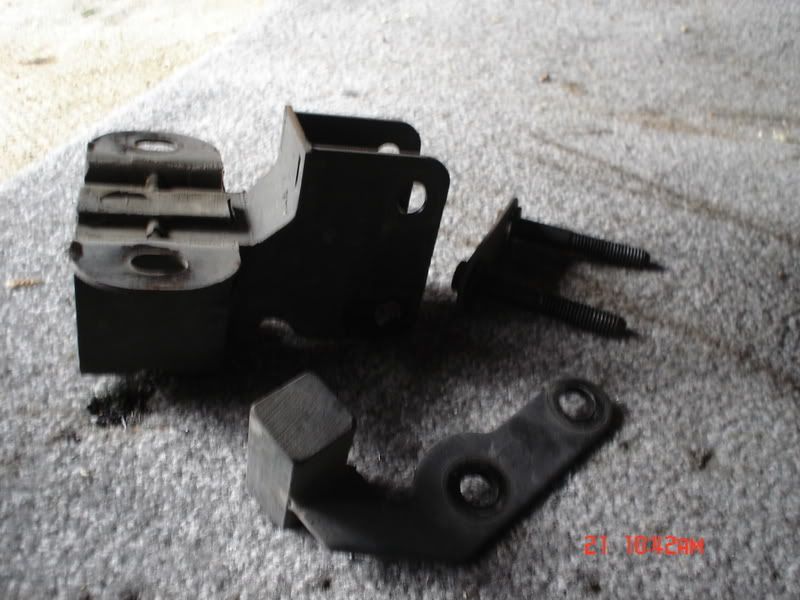
Move back to the back of the car(I know, back and forth, but this saves your knuckles from falling shafts) and remove the rear drive shaft loop while holding the shaft with your other hand. These are 13mm bolts also.
Now, place a drain bucket underneath the tail shaft of the transmission because when you slide the shaft out, you may get some ATF dripage and you don't want to make a mess. On the 4 shafts I've swapped, NO fluid came out of the tail shaft, but a little came out of the input yoke on the shaft when it angles down when you slide it out.
Go back to the rear and slide the shaft out.......

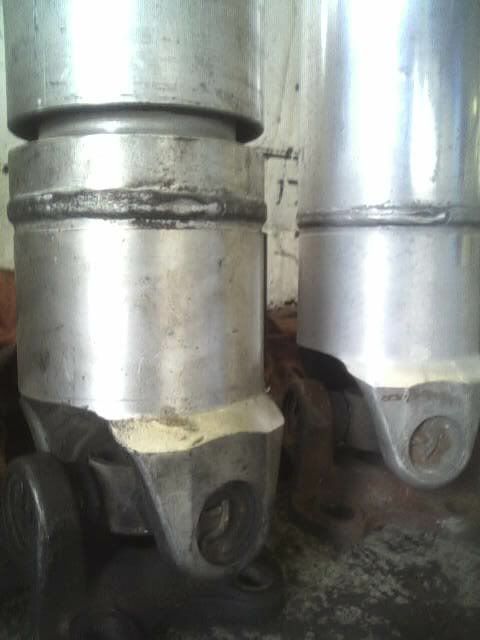
Here is a comparison showing the old shaft next to the "new" shaft(they even polished the shaft, nice of them). Notice the gaps on the bottoms of the shafts where the "tube-in-tube" design is pieced together. A ONE piece shaft will be filled in.
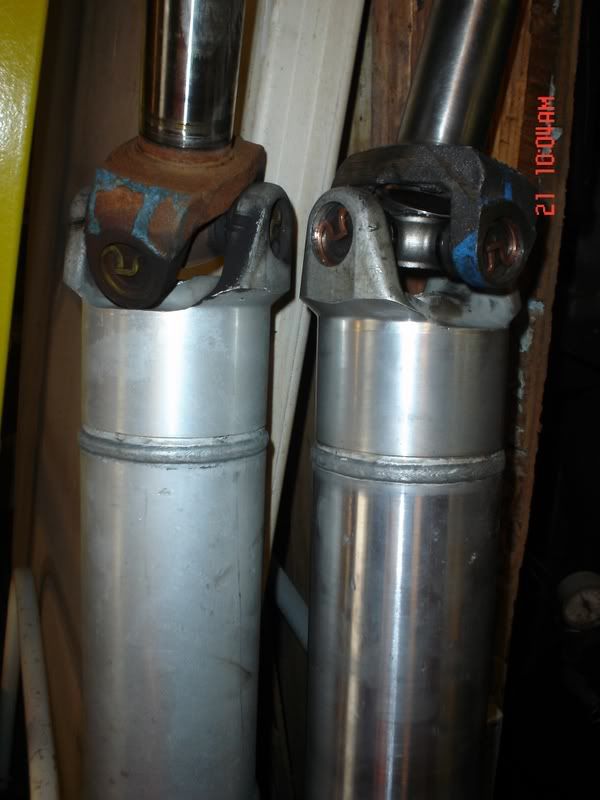
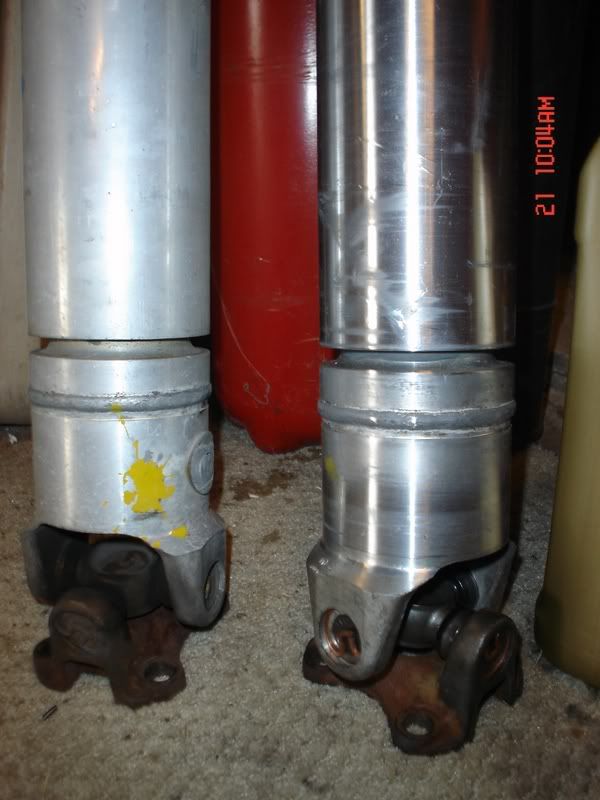
****My old two piece next to my used one piece...notice NO gaping hole?****
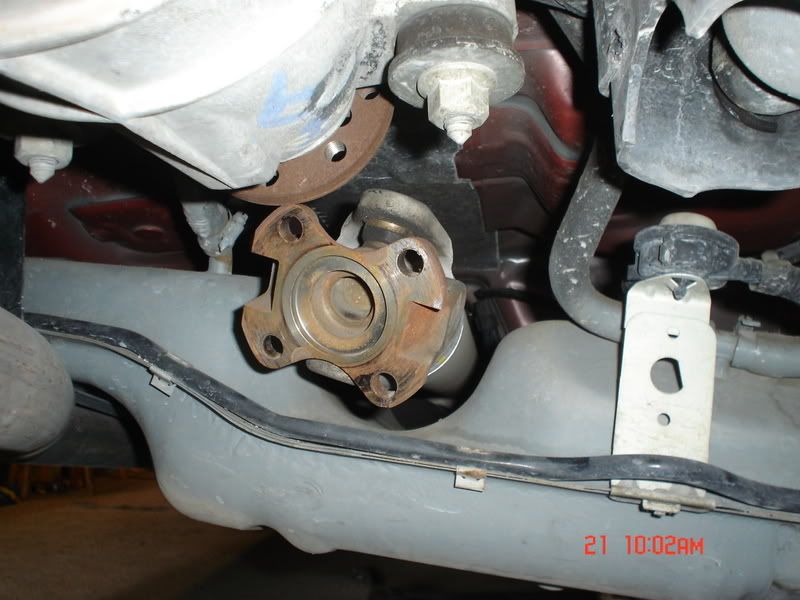
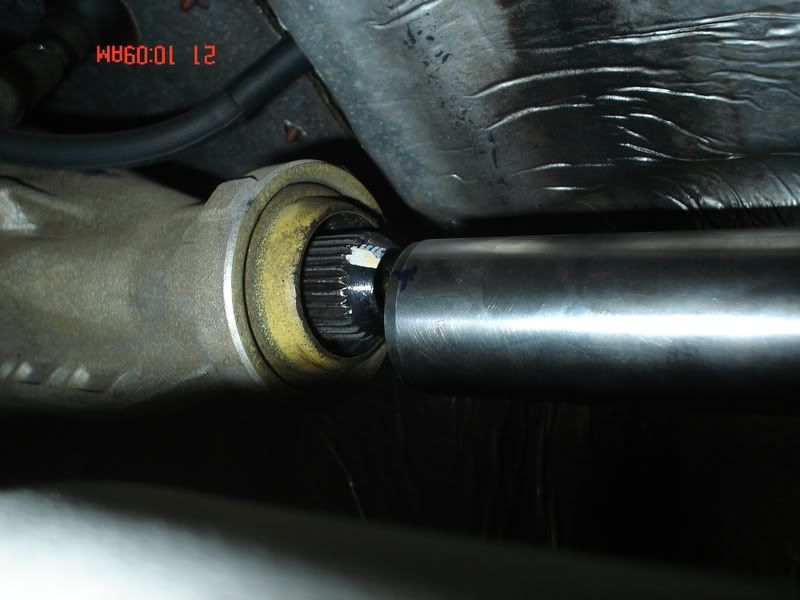
Now that you've removed the old shaft its time to install the "new" shaft. First you need to locate the paint marking on the output shaft.....
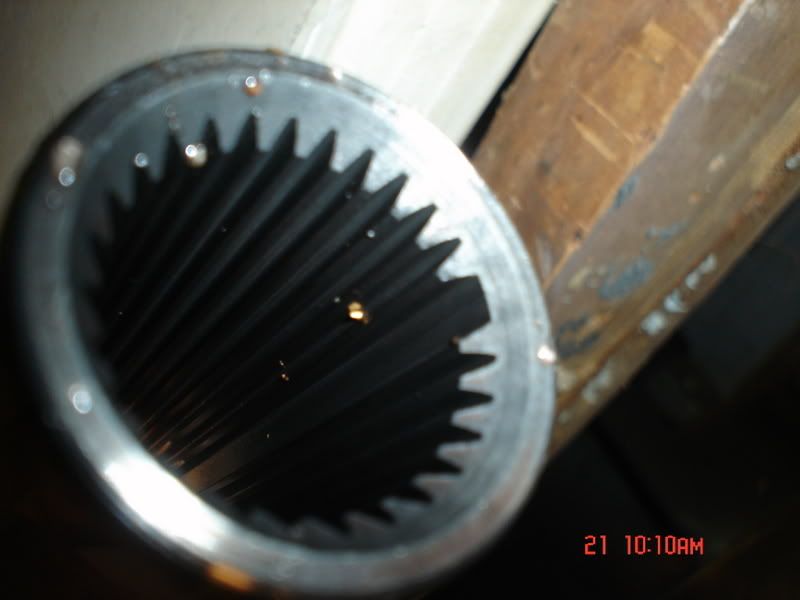
Next locate the "notch" inside the input yoke of the shaft and mark the outside of the yoke with the marker you have set aside.
Now, line up both of these marks when installing the shaft into place. Before you start tightening that bolt in your hand....FIRST put a touch of Lock-Tite on each of them....
Tighten them using the double wrench method with a reasonable amount of force, single wrench isn't going to be enough(unless you're a buff man argggg*rips t-shirt in half*, haha) so double wrench it and save your back, and you're "o-ring"(for those old timers still wrenching, lmao).
Reverse for installation, and the only concern is to install the fill/vent hoses BEFORE you completely tighten the fuel tank straps or you'll have to bend/force them into place. I placed them on the tubes and than slid them on completely once the straps were tight. Also....after the shaft change, MAKE SURE you double check your transmission fluid just incase you lost some.
First off, the shaft came out of Max's 98 Base and has low miles on it(Max got a MMX shaft), so I sent it out to the local shaft shop, DriveLine Services, and had it gone through. They replaced both u-joints, straightend and balanced it(15k rpms). The shop can also replace/rebuild the rubber inserts if there is any vibrations. The repair to Bobs new shaft was $94 bucks delivered with a 24hr turn around.
Next, the 98 has 87k on it and the diff. hasn't ever been serviced as far as he knows so I figured I'm right there so its time for a service.
A standard swap WITH air tools should take the average at home mechanic NO MORE than 2 hours, I did it in just about 1...maybe a little less.(Note times of pictures, I did the shaft first, and than started the diff service)
Here are the tools you'll need for the drive shaft swap....
Air Impact Gun(or equivalent hand Ratchet)
12" 3/8" extention
13MM Wobbly Socket
Long Flat Head Screw Driver
Long Pry Bar(29")
1/4" Ratchet and 5/32" socket w/6" extention for fuel tank hose clamps(or small flat tip screw driver if you can get to them)
12MM 12 POINT Ratchet Wrench
13MM or bigger Open end Wrench for double wrench leverage technique(DWLT, lol, I'm making up sh*t now)
Marker or equivalent for making shaft for alignment
Lock Tite for drive shaft to pinion flange bolts
Last but not least...safety glasses to prevent this..........
Or this...........LMAO
Ok.....start by jacking the back of the vehicle up as high as safely possible and place jack stands underneath and rest the weight of the vehicle on the stands. Remove the jack for later use to support the fuel tank. I placed the jack stands on the lower control arms because my stands sit snugly inside the drain holes where the stock air springs sit. Make sure if your car still has the factory air, you turn OFF the air ride switch IN the trunk. Bobs car was converted(by me).
Next you'll want to remove the drive shaft bolts using the 12mm 12 POINT Ratchet Wrench with the 13mm open end, using the double wrench method.
You may have to release the parking brake and place the car in Neutral to spin the driveshaft, you can also use the long flat head screwdriver to stop the driveshaft from spinning by placing it in the u-joint. I was able to get access to all the bolts without turning the shaft.
Once you've removed all the shaft bolts, the next step is to remove the fuel tank straps(different than pictured above but easier to remove the shaft bolts with the tank up). Start by removing the rear(of the tank/car) 13mm strap bolts using the impact gun with the 13mm wobbly socket and 12" extention. The tank won't fall to much so no worries.
Passenger Side Strap
Drivers Side Strap(notice the exhaust pipe at the bottom right)
*******These next steps were required on Bobs, but NOT on my 95, nor Max's 98. I was able to remove the shaft on both of our cars without removing BOTH straps completely. I would suggest seeing how much movement you get when remove just the back(of the car) bolts/straps on the tank. The back of our tanks rested on the exhaust and with some cohersing our shafts came out, it was tight, but saved a HUGE amount of time, IMHO.********
Next you'll want to place the jack underneath the middle of the gas tank and raise it so it slightly puts pressure on it. Now remove the front(of the car) 13mm strap bolts and move them out of the way.
With the weight of the tank now on the jack, you'll want to loosen the hose clamps on the fuel filler tube(both fill/vent hoses) and remove both hoses. I used a long pry bar for leverage to remove the hoses.
Next you lower the jack and the fuel tank down about 6-8" which is plenty to remove the shaft. Make sure if you have a FULL tank, that you don't go so low as to dump gas out of the fill/vent tubes.
******continued if you didn't have to remove ALL the straps and extra steps needed to lower the tank more.********
Now that the tank is lowered out of the way, you'll want to remove the middle drive shaft "loop" just in front of the gas tank. Also 13mm bolts so use the 13mm wobble/extention/air gun setup.
Move back to the back of the car(I know, back and forth, but this saves your knuckles from falling shafts) and remove the rear drive shaft loop while holding the shaft with your other hand. These are 13mm bolts also.
Now, place a drain bucket underneath the tail shaft of the transmission because when you slide the shaft out, you may get some ATF dripage and you don't want to make a mess. On the 4 shafts I've swapped, NO fluid came out of the tail shaft, but a little came out of the input yoke on the shaft when it angles down when you slide it out.
Go back to the rear and slide the shaft out.......
Here is a comparison showing the old shaft next to the "new" shaft(they even polished the shaft, nice of them). Notice the gaps on the bottoms of the shafts where the "tube-in-tube" design is pieced together. A ONE piece shaft will be filled in.
****My old two piece next to my used one piece...notice NO gaping hole?****
Now that you've removed the old shaft its time to install the "new" shaft. First you need to locate the paint marking on the output shaft.....
Next locate the "notch" inside the input yoke of the shaft and mark the outside of the yoke with the marker you have set aside.
Now, line up both of these marks when installing the shaft into place. Before you start tightening that bolt in your hand....FIRST put a touch of Lock-Tite on each of them....
Tighten them using the double wrench method with a reasonable amount of force, single wrench isn't going to be enough(unless you're a buff man argggg*rips t-shirt in half*, haha) so double wrench it and save your back, and you're "o-ring"(for those old timers still wrenching, lmao).
Reverse for installation, and the only concern is to install the fill/vent hoses BEFORE you completely tighten the fuel tank straps or you'll have to bend/force them into place. I placed them on the tubes and than slid them on completely once the straps were tight. Also....after the shaft change, MAKE SURE you double check your transmission fluid just incase you lost some.
")