Subframe Braces

driller

El Presidente
Staff member
I finally got a chance to get to a shop to install sub-frame braces.

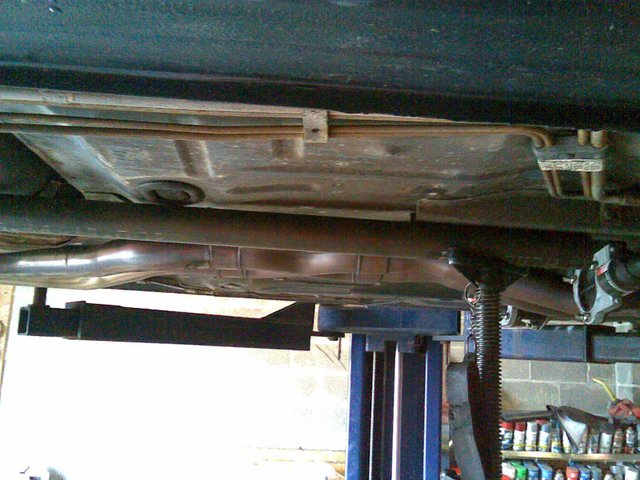
I elected to use 1-1/2" ChromeMoly round tubing(1.9" OD). We made brackets and bolted to the subframe to attach the tubing at the rear and fabricated another pair of brackets up front to bolt to the front subframe.

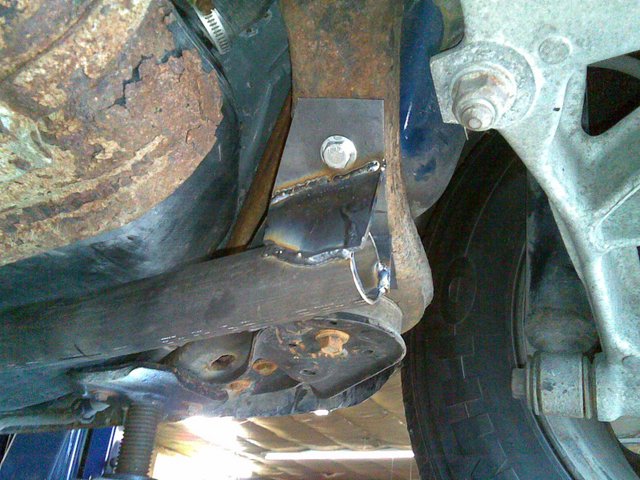
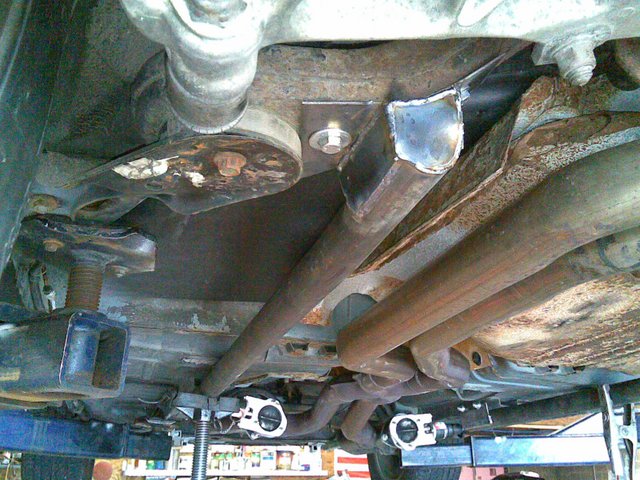
Here is the tubing fitting on the front subframe.
Image003.jpg


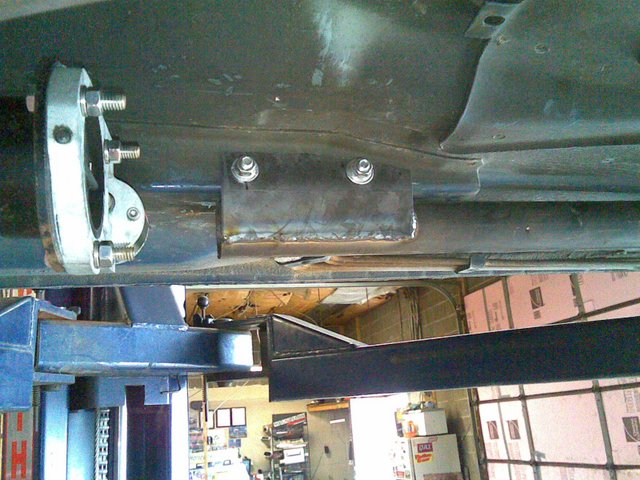
A slight bend at the back end was needed before we could begin boxing in the rear.
Image004.jpg

Image005.jpg


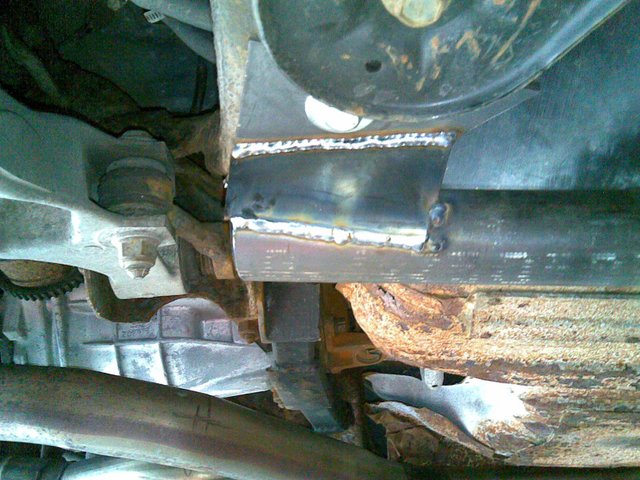
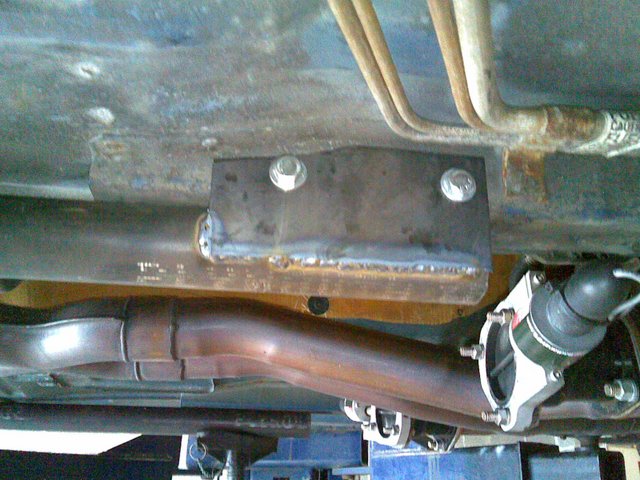
Here, the rear passenger side is complete.
Image006.jpg


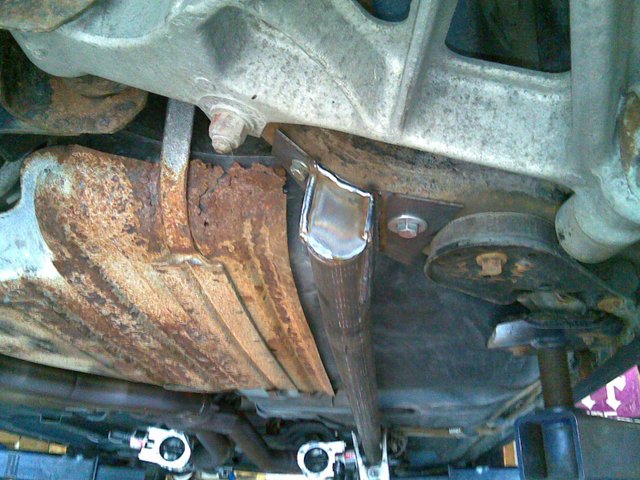
Now it was a simple task to fabricate side plates, drill holes and bolt up the front.
Image007.jpg

Image008.jpg


Then the process was completed for the passenger side.
Image009.jpg


I could tell on the drive home that the chassis was stiffer. Hopefully I'll soon get a chance at the track to see if the car launches better. :D
 
Gees JP, do you have a little salt on the roads out there?

That looks like it's mostly the fuel tank shield.

I think they act like the "sacrificial zincs" that they put on boat hulls (they corrode first to save everything else).:D

Mine was worse than that.

Looks great. How long did that job take? It looks like anyone with a welder and some stock could do this in an afternoon.
 
Gees JP, do you have a little salt on the roads out there?

With rare exception, it doesn't go out in the winter... anymore. What you see is the result of being a daily driver for like 9 years. Most of the worst is the rear subframe and gas tank shield. Both can be replaced and the rest of the car is solid and would be pretty easy to preserve with some POR-15 and TLC.
 
Looks great. How long did that job take? It looks like anyone with a welder and some stock could do this in an afternoon.

It was $60 materials and 4 hours labor. The same shop that did the exhaust fabbed these braces. I just helped turn wrenches. He builds roll cages for drag cars from the same material. It is super strong and lightweight.
 
It looks like anyone with a welder and some stock could do this in an afternoon.

Lol....I sense sarcasm :D

Looks good JP, did they use a Plasma cutter for the brackets and end caps? I need to get one of those, haha. Its gonna be nice when you go over speed bumps cuz it can slam and you feel confident that nothing is being damaged anymore. Also...take some entrances to shopping centers at a 45* angle and feel the right rear tire come off the ground :D
 
Serious question ... now that you have a "jig", why doesn't your guy make more sets ? I like the fact that they bolt on. Same goes for the front braces.
 
Actually he used a chop saw, sawz-all and bench grinder. The plasma cutter would've been quicker but it was broken.

I measured up for some 'jacking rails' for on the rockers next to the pinch welds. A 6 foot section of 1-1/4" x 2" rectangular ChromeMoly would be easy to install and help stiffen it further. Not only that, but then you could use one jack to raise the whole side of the car at once, say like at the track for those pesky tire changes. :D
 
Serious question ... now that you have a "jig", why doesn't your guy make more sets ? I like the fact that they bolt on. Same goes for the front braces.

We talked about that. I would really be concerned about the fit from car to car. There is literally only one predrilled hole on each side(on the rear subframe) and it very well may be different on each car, so at the very least the holes would need to be slotted/ovaled. The other holes must be drilled and drilling the front subframe requires a short 90 degree angle drill, something few will have access to.

As a custom fit it was not that tough a job. Basic metalworking was all that was needed - nothing fancy. The guy I used is pretty good at this stuff. He flies around the shop, marking the steel freehand with a sharpie for bends and cuts. If it were me, I'd still be measuring and marking the pieces in the time it took him to complete one whole side.
 
Jeremy....a "jig" would be easy.....and you wouldn't have to worry about fitment if you made the brackets but didn't weld them to the connectors until they were recieved. But then you'd have to know someone with a welder to install them, haha.

Honestly, there is nothing to them.....I welded mine on for durability/ease if installation, but obviously bolt-on kits would be more practical. The way I look at it is I want them to be as stiff as possible and if I have to drop the tank for some reason, I can just cut a section out and re-weld it back in.

JP....is your car lowered or can you not fit a jack under the connectors? When I jack my car up I just use my connectors(the are square so the jack won't slide off) and I can actually lift 3 tires off the ground. :D Teeter totter style, haha!
 
Thanks for the great pics and post John. In the pics it appeared that the floor pan or tank guard might be in contact with the new brace. Yes ?? Can't wait to read about your evaluation.
 
JP....is your car lowered or can you not fit a jack under the connectors? When I jack my car up I just use my connectors(the are square so the jack won't slide off) and I can actually lift 3 tires off the ground. :D Teeter totter style, haha!

It was lowered. When I get the ASHAM8 module working it will be adjustable so it will make maintenance a lot easier by allowing easier jacking. I need to get one of those speed jacks.

Thanks for the great pics and post John. In the pics it appeared that the floor pan or tank guard might be in contact with the new brace. Yes ?? Can't wait to read about your evaluation.

This pic shows the worse clearance -

Image003.jpg


- the passenger side. If you note, the floor pan plug was pulled and reinstalled wrong side out. There is barely clearance at the fuel tank - maybe 1/8". The drivers side has more clearance, even at the fuel tank.
 
sweet

sweet

Sweet JP. I didnt know you were running the ex cutouts. How are they holding up? Do they leak? Did you have them on at SSHS? I was thinking of doing that but my exhaust guy said no way would they fit. I should show em your pics. Take us a side shot of them with car on ground. Can you see them walking up to the car sideways? or are they tucked in further? Let us know what they knocked off times in the 60 foot. Are you guys still working the bag thing with the preload one side gizmo? If not, im thinking of going to regular springs and loosing the air compressor stuff.
Not sure how much of weight savings itll be, but longevity of the bags has gotten a bad taste in my mouth. I need rears aready and i just did all 4 about year and half ago. There leakin from being slammed? is my only guess cause the rubber is still soft and supple. :big-grin:


I could tell on the drive home that the chassis was stiffer. Hopefully I'll soon get a chance at the track to see if the car launches better. :D[/quote]
 
Yeah, there's room for cutouts. I had to go back to stock height from sensor lowered - at least temporarily. I have a height adjustment control module I am working through problems with right now.

I have the tails off the dumps right now since the install of the braces. I'll have them reworked soon and put back on - they swung out to the side too much and interfered with the braces. I'll try to get pics once things are sorted out.

They initially leaked a bit. I tweaked them and they are almost 100% sealed now - just barely a noticeable difference when you close them and then release the switch.

Definitely an improvement at the track with the cutouts. No, I didn't have them at SSHS or you'd have certainly known. LOL Looks to be worth close to a tenth in the quarter.

Once I get the height adjustment module working, I'm going to do some testing and tuning at the track at different heights. I need to get a remote gauge setup for monitoring pressures as well.
 
Back
Top