Adding heated seats to a 1999 Town Car

tixer

Lincoln Evangelist
About a year ago, I decided to upgrade from the 1986 Town Car to a '99. Since this is the "winter car," and the new one has a leather interior, it didn't take me long to decide that heated seats were a necessity.

Oddly enough, although this car is the "Signature series - Touring Sedan" it came with neither heated seats, nor the keyless entry (keypad.)

I found a kit on Amazon for about $50 that allowed me to add heat to the seat and backrest of both seats. The price was right, so I ordered it up.

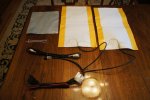
This is one half of the kit. (one seat.) Everything is of surprisingly high quality. The harnesses are all well made and pre-wired, connectors engage and disengage nicely, and my favorite part, the switches for the heat are round, to make mounting as simple as drilling a hole. It even came with extensions for the switches, and a separate fuse holder (with fuse) to wire in if required.
DSC06480.jpg

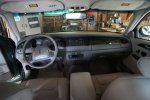
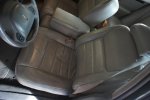
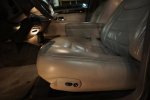
Now I present, the Victim:
DSC06483.jpg

DSC06482.jpg


Removing the seats seemed to be the best bet for an easy install. I moved them to a position where the bolts were readily accessible, disconnected the wires, and removed the four bolts/nuts that secure the seat. You'll need a 13mm and 18mm socket for this. probably an extension or two and a breaker bar, depending upon how rusty those bolts are. Mine came out surprisingly easily. The two that secure the front of the seat go through from the top, but are exposed underneath the vehicle. The two at the rear of the seat are nuts, and should come off easily.


Here's what the underside of the seat looks like.
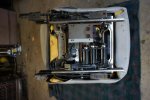
DSC06484.jpg


The leather is stitched onto some plastic "clips" that hook over the metal frame of the seat. They can be removed by prying gently from underneath.
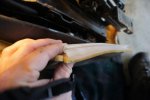
DSC06486.jpg
 

tixer

Lincoln Evangelist
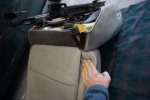
Removing the leather from the back isn't much more difficult. On the back of the seat is a large plastic panel that contains the map pocket. It needs to be removed first.

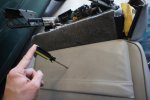
There's a screw here, (#2 Phillips) that can just barely be accessed by pulling down on the center of the map pocket. Take this out first.

DSC06490.jpg


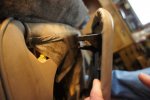
Next. there are two plastic "hooks" that secure the base of the back-plate. One on each side, located here:

DSC06489.jpg

They're pretty stiff, and require a "pry and pull" approach. Here's a better look at the clip:

DSC06493.jpg

The top of the panel is held in place by two large plastic "tongues" that hook behind more of the framework. Once those bottom two hooks have been released, it lifts right off.

Once Inside, you've got a few more plastic clips to release, and a zipper to un-zip that surrounds the air-bag. (you'll need the slack this provides in a moment.) I'm really glad I'm doing this with all of the wiring disconnected.

DSC06494.jpg

I don't think I'll ever get over how clever that Lumbar mechanism is. Major props to whoever came up with this design.

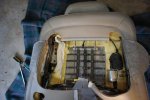
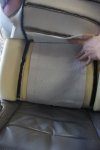
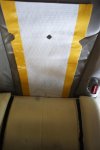
Anyway, the leather on the backrest can simply be "rolled" up. at this point. You'll find some hog rings supporting the contour toward the top of the seat back. They'll need to come out, but stop there for now, and test your kit for fit. Here's what mine looks like.

DSC06495.jpg

Just about perfect. The instructions for this kit indicate that they may be trimmed for length, but as far as I'm concerned, more heated area is better. :D
 

tixer

Lincoln Evangelist
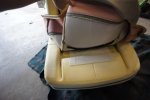
Now it's time to do the seat base (or "Pan" if you want to get technical.) The first thing you'll notice as you peel the leather back, is the length of "world's strongest Velcro" running laterally across the seat, as well as the bolster supports running lengthwise. along each edge.

In the case of my own seats, they were worn enough that the "Velcro" had become detached from the foam. I simply threw it out. (it had been in the groove that's visible, running the width of the seat.) If this is in better shape in your own vehicle, I'd be tempted to trim the heat-pad to fit behind it, at the potential loss of toasty-warm thighs.

DSC06496.jpg

The bolster supports I left alone, noting that the heating pad fits between them, and I had adequate space in which to slide the mat to the back of the seat.
For the wiring, I suggest following the route taken by both the air bag wiring and the lumbar support motor. it is easily reached, clear of obstructions, and it means the wiring won't be visible through the seam where the backrest joins the seat.

Once you have positioned the heater pad, carefully remove the adhesive backing, and secure it to the seat foam.

Now is the time to go get yourself a beer before we move on to the backrest.

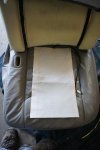
Here again, we have to chose between trimming the heating pad or getting clever.

DSC06497.jpg

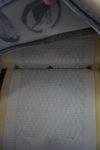
Since I like my upper back to be heated, I decided it was worth the effort. You'll need to remove those three hog rings that support the top of the back seat. I really don't have any tips or tricks for this other than some profanities, and a couple beer breaks.

Once you've removed the rings, trim the pad thusly. Being careful not to nick the copper "bus" that runs up each edge of the pad.

DSC06498.jpg

On this particular kit, the "grid" is ok to trim, but a cut in the edge, means that anything beyond that would not be heated. Try to leave a bit of extra clearance, since those rings attach to a metal bar, I'd hate for anything to short out.

DSC06499.jpg

DSC06500.jpg
 

tixer

Lincoln Evangelist
The last photos I have are of the mounting location I used for the switches.

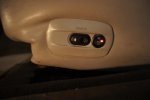
Ideally, I would have mounted them on the dash, to either side of the climate control. (so I can turn on the heat for a date, of course!) but this would have required extending the wiring, and securing it in such a way as to compensate for movement of the seat. For simplicity, I opted to keep the switches near the rest of the wiring. I noticed that there was just enough room in the cover for the lumbar switches (and the frame for the seat) to accommodate the switches for the seats as well.

DSC06898.jpg

DSC06897.jpg

Really, that's about all there is for the heaters themselves. Strap the remaining wiring together under the seat, and it is on to the electrical.

This part is tricky only because I was somewhat stubborn about it. I wanted to use factory wiring where possible, and I wanted the seats to be switched with the ignition, so I didn't have to make sure they were turned off every time I got out of the car.

As it turns out, even on models without factory heated seats, the wiring is (mostly) present, and the appropriate fuse is already installed. I borrowed an EVTM from a good friend, and got to work. Regrettably, I took few notes, so here I'm going from memory.

On the driver's side, I used the harness that came with the seat, and ran it under the carpet up to the driver's kick-panel. I found a good ground, and located the heated-seat wire (Black with a red stripe, if memory serves) The wire was much smaller than I expected given the function. 18 gauge, I'd guess. I tested the wire to make sure that it did indeed turn on and off with the ignition, and that it lost power when I pulled the fuse labeled "heated seat" in the owner's manual. Rather than splice or tap, I carefully stripped back some of the insulation, soldered the wires together, and taped it off.

Everything checked out, life was good.

For the passenger side, running the heated seat harness to the same location I tapped the driver's one would have required extending the harness. Instead, I removed the passenger door panel, and found the factory harness behind the door panel where the factory heated seat controls would typically mount. The controls weren't there of course, but the wiring was. utilizing the EVTM, I connected the "+12 switched" wire to one of the wires intended to feed one of the OEM elements. (I think I picked a red one) I simply cut both wires, soldered them together, and heat-shrinked them. Then used the harness that came with the heated seat kit to solder on to the ground and that red wire (and ground) at the seat connector. The only way this could have been cleaner is if I located the pins used by Ford to insert into the seat-side of the factory harness.

The end result is two heated seats, running on the factory 15A "heated seat" fuse, and with both on high, I have yet to blow the fuse.

I'm calling this a successful little upgrade. The seats get quite warm, and after nearly a month of use, they still work.


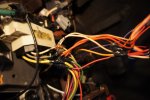
Now for a little rant: Part way through the project, I looked up under the driver's side dash, and saw this:

DSC06501.jpg

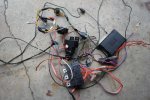
That's the harness for the brake light switch. Although I'd seen other indicators that a remote start had been installed in here at one time, I wasn't given any remotes, nor was it mentioned when I bought the car. After fixing that wiring however, I went on a bit of a rampage, gutting every bit of aftermarket anything that I could find. It turns out that most of the remote start was still in the car, but one of the fuses had been removed.

I've never been one to place much trust in an aftermarket system that is as invasive as a remote start, but the installation of this one was particularly frightening. Wires were just "chopped" at, breaking many strands in the process. The wiring for the remote starter was then simply wrapped around this, and taped when it was convenient to do so. I'm really surprised this thing didn't burn.

DSC06503.jpg

Some of these wires are always hot. So scary...

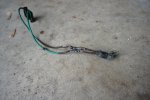
Here's everything I managed to remove:

DSC06505.jpg

I feel much better about the car, now that all of this is in a heap in my driveway. There were even a couple wires that ran through the engine compartment. Unprotected, and unsecured.. It was really a mess. Please, do not let someone do this to your car.
 

fastmark

New member
Great write up on the heated seats Mike!! Looks like a very nice job as well. hope your back side is well heated now, LOL. Mark
 

Lvnmarks

quandoomniflunkusmoritati
Great write mike! If you remember what page/diagrams you were looking at I can post some pictures of those as well for you.

I'm guessing this would be a similar process for a Mark VIII as well (just different wiring)

- - - Updated - - -


This is kind of an artsy photo, I like these working shots and think more of them should be in the calendar.
 

tixer

Lincoln Evangelist
Steve: there's no point in that kind of external combustion if you can't also use it for locomotion. Maybe I'll have to do something like that for the Jeep. I'll bet there's room for a boiler under the hood.
 

SCTBIRD1173

Mark my Bird!
Thanks for the write-up Mike! I believe this is the same kit I have saved in my Amazon wish list for my '95 Taurus. I plan on installing OEM heated seat switches out of a newer Ford of my choice when I do this job on my '95 Taurus. Since there wasn't heated seats in a '95 Taurus I'll try my best to make it look like they belong there.

I was glad to read you tried to use as much of the factory harness as you could and the fact that you ripped out that haphazardly installed remote start system... You are much like me which makes me proud! :) :thumbsup: I had a friend of a friend, who owned his own car audio store, install a remote start in my Wife's near mint '90 SC back in the day and he wound up breaking a piece of the dash! Along with the connections looking a lot like yours did! Of course I was never made aware of this but when I found out I was reassured why I never let anyone touch my cars... :( Fast forward many years to about a year ago when my wife and I decided to put a remote start in our '05 Explorer. I made sure to get the OEM Ford accessory made for the truck so I can plug most (some) of it in... LOL come to find out vehicles that early didn't have any provisions in the kits for plugging into factory connectors :p So on my workbench sits 2 boxes with a bagillion wires in them (it's the Gold system ;)) that will have to be hard wired to everything in the car! With my OCD I can see this taking a full weekend or two to install my way... :mad-tilt:
 

tixer

Lincoln Evangelist
Here's the kit I bought. Assuming it lasts a few years, I'm quite pleased with it. I would do it again. I was hesitant to post the link in the original article because it wasn't a "brand-name" seller or product. Who knows how long this exact kit will be available.
http://www.amazon.com/gp/product/B005PJ334G/

As for your remote start, don't do it. :) These things are evil. I've installed a few for friends in the past, and even in the most simple vehicles, it seems like a terrible idea. You have to bypass nearly every security feature just to make it work, and there's simply no way to install one cleanly. Although the ones I've installed were undoubtedly cleaner (and safer) than this one, I'll probably never trust them. They're just too invasive.
 

chris2523

New member
the 93 has a remote start. there weren't any safety features to bypass..
i bought a wiring harness that bolted in between the the factory wiring and the steering column connector. hooked up the wires and i was done. that was about 5 years ago now.

of course, this gets complicated with PATS and stuff.
 

Lvnmarks

quandoomniflunkusmoritati
I just wanted to comment on this and say I purchased the same kit and installed it in my Saturn with cloth seats a few days ago. It works beautifully and highly recommend this!


I would like to add that no instructions came with the kit but Mike does a great job explaining every thing. Also the one thing that hadn't been mentioned is the two sheets of tape that accompany the kit, luckily I found a you tube video explaining it. It's simply to cover the cut ends of the carbon fiber if trimming the pad is necessary.

In my installation I opted to add a dedicated power circut w/relay to power my seat elements because it's a Saturn and it doesnt have the wiring already there. Plus most people tap into the cigarette lighter power but in the S series cars they are engineered poorly. Thus a dedicated circuit was constructed.

Thank you again Mike for the great write up!
 
Top