Steering fluid leak

driller

El Presidente
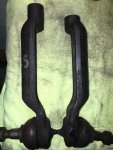
Modifying the tie rod connection...

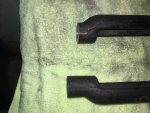
Sawing 1/2" off the end of the connector is harder than it looks. I figure most anyone else would've used a power tool of some sort but being 'old school', I opted for a hack saw.
IMG_1487.jpg

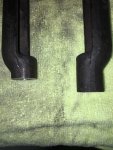
But it turned out pretty well:
IMG_1488.jpg

IMG_1489.jpg

IMG_1490.jpg

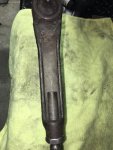
After a little de-burring work with a file, the test fit in the inner tie rod with the stainless steel jam nut worked well.
IMG_1491.jpg
 
Last edited:

billcu

Head Moderator
I'm curious to see how the car handles with this manual rack. I might want to try this the next time I have to swap a rack. :)

Would it have been possible to just use the Lincoln inner tie rods instead of cutting the outer tie rods?

I checked, my 94 has a little more than 2.5 turns lock to lock, the gen 2's have a little more than 3. I don't know what the 96 would have but I'm guessing it's the gen 1 ratio.

With the manual rack at 3.5, the extra mechanical advantage would probably be enough to make steering easy enough in parking maneuvers, but at higher speeds the steering might feel a little loose?
 

driller

El Presidente
Would it have been possible to just use the Lincoln inner tie rods instead of cutting the outer tie rods?
I thought of that but was unsure of the interchangeability of the connection of the rod to the rack.

I didn't really desire to disassemble the new rack when all I really needed was room for a locknut and an extra thread. Had the threads been different, that would've been a definitive reason to look at swapping the inner tie rods.
 

BlackIceLSC

New member
love the fortitude in your "I have a power steering fluid leak" to "I swapped racks to manual steering, modified the drive belt system, modified the old tie rod ends to work with the new manual rack" approach.
Your story makes everything seem like "parts is parts...it all comes down to time, money, know-how and tools"

you must be an engineer. Or have large attachments.

The whole "I'll convert my car to what I want as long as there are parts available" approach is commendable. Makes it nicer that it isn't your only car or a daily driver. Back in the day (circa 2003-2009) when I had my modified 94, I would have LOVED to "do what you do" to your 93. I had spare cars...I had the tools, the time, the money and the know how. I like to think I even have the "large attachments"....but I also loved driving my 94 the way it was.
Made it easier that I already had a purpose-built race car, trailer, local track, etc.
great job on this HOW TO FIX_____ thread JP.
 

driller

El Presidente
I picked up on this project after being sidetracked for a couple weeks or more.

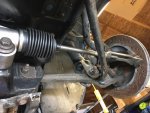
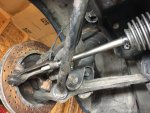
I modified the other outer tie rod end and attached the tie rod ends to the new rack. After some articulating I was able to bolt up the manual rack and connected the tie rods to the spindles. A quick visual confirmed I had ample adjustment as it appeared to have excessive toe in. (I did purchase the QuickTrick alignment toolkit to set the toe.)

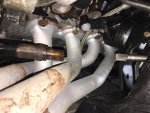
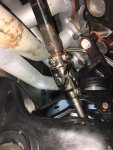
When I went to connect the steering shaft I encountered my next dilemma. Apparently the steering rack shaft is shorter on the manual rack compared to the stock power steering rack. Had the car been stock, It likely would've simply extended and mated to the new flaming river joint but the car has been previously modified to accommodate the Kooks headers and the telescopic DD shaft was pinned to the outer sleeve. Now the joint is about 2 inches short of reaching the steering rack shaft.

If anyone has an intermediate steering shaft assembly available, let me know. I can likely remove and modify what I have but it may be easier to start fresh.

I didn't have time to take pics, I'll post some up later.
 

Whtwhale

New member
Just installed a manual rack kit in my 96 firebird this past winter and have been daily driving it. Woah nelly is parking tough! 275 tires up front make slow speed an absolute bear even with a 15 inch steering wheel. The car is way more fun to drive though, i commend you on going manual it will be a hoot!
 

driller

El Presidente
Ooo... shiny!

IMG_1745.jpg

Both tie rod ends modified and fit up with adequate toe adjustment available.

IMG_1743.jpg

IMG_1744.jpg

As it turned out, the steering shaft was simply stuck making me think it was too short...

IMG_1746.jpg

After removing it from the car and exercising the collapsible shaft, it bolted right up with the new Flaming River joint.

IMG_1747.jpg

Just need to double check everything and bolt the front bracing back up to be ready to check and adjust the alignment with my new toys from Quick Trick Alignment. :love-it:
 

Lvnmarks

quandoomniflunkusmoritati
Mine also took some 5lb persuasion but it does move. Looks nice JP! Love the oil pan too.
 

driller

El Presidente
Finished the toe adjustment today.

IMG_1764.jpg

As suspected it was way out of whack. I tried using a laser but went to a string line to rough everything in. The laser just wasn't practical without some type of micro-adjustment to pan the laser line parallel to the car.

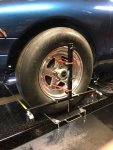
As it was I simply strung a string line down each side of the lift at hub height for a reference. After checking tire pressures, securing the steering wheel and assuring the air ride was at proper 'parked' height, I adjusted the toe settings to zero toe each side. I then utilized the QuickTrick alignment fixtures to dial each side in ever so slightly ending up with just over 1/16" total toe in (about 1/32" in each side). Basically I was shooting for zero with a minimum tolerance to assure there would be no toe out but just a minimum amount of toe in.

It was a rather tedious process with a lot of back and forth. Once I got the hang of it, it wasn't so bad. I'm quite confident with the outcome.

I guess that means the power steering leak is officially fixed. :fart
 

billcu

Head Moderator
Yes, it can be tedious, wait until you get to camber and caster.:D

I don't use string, I just use tape measures to measure the difference between the front and rear of the tire. I've only got 1 fixture, do you have one for each wheel?

How do you know when the strings are parallel and square with the car?
 

driller

El Presidente
Yes, the QuickTrick alignment kit has 2 fixtures, one for each side. Included are two tape measures that attach to slots in the cross bars to measure in front of and behind the wheels to measure the total toe. (The kit I have only has one digital level to check caster/camber but they have a kit with two digital levels. They even have their own turntables but I used a different pair.)

You wouldn't necessarily need to 'string the car' if you were just checking the alignment. But since I had replaced the entire rack and everything had been disconnected, the entire steering system was out of adjustment. If you were to use the tapes only you could in theory adjust the toe but it could be to the left or right as a parallelogram - with both the front and rear measuring the same but not square with the car chassis.

So what I did was center the steering wheel and secured it in place with the aid of the seat belt and power seat. I put the lap/shoulder belt through the steering wheel and clicked into place with the seat adjusted forward. I then adjusted the seat rearward tightening up on the belt until the steering wheel was secured from moving. (Oddly enough, the steering wheel "lock" is slightly "off center".)

With the car on the lift and the lift at bench height, I disconnected the shift cable from the transmission and rolled the car forward to the front wheel stops on the lift. I then positioned the turntables behind the front wheels and then rolled the car back so the front wheels were centered on the turntables. I then chocked the rear wheels to prevent any unintended movement. (Disclaimer... the turntables I used are 'full motion' - meaning they can and will slide any direction -not just "turn". Caution must be used to not put any lateral force on the front of the car as you could easily slide the car right off the lift! :eek:)

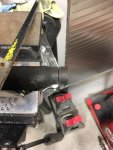
Of course the car is not necessarily square and/or centered on the lift, so I rigged up two string-lines, one on each side at hub height using some clamps and short pieces of aluminum angle. I clamped a section of angle on each corner of the four post lift for a fixture to tie the string to. I adjusted each string-line until it was parallel to the car by measuring from the string to the center of the hub on the front and back wheels. (I tried to use a laser in place of the string but it was almost impossible to position the laser exactly where it needed to be. Trying to adjust the laser 1/16" at a distance of 20 feet or so is a lot tougher than it appears!)

Now with two string-lines, parallel to each side of the car, it was simply a matter of measuring and calculating to determine if they were parallel to each other. I measured from the string to each corner post of the lift and then measured from post to post on the front and rear. Believe it or not, my first attempt had the string lines within 3/16" of parallel for the length of the lift. It only took very minor adjustments to get them pretty much spot on, at least within the thickness of the mason twine I was working with.

So now the string-lines are set and the alignment fixtures are on the front wheels. According to the alignment fixture I had about 1" of total toe in. I then measured from the string to the front and back of each front wheel lip to determine the individual toe for each wheel. The passenger side was worst so I started there, adjusting the tie rod to zero toe measuring off the string line. Then I adjusted the drivers side. Once both sides were adjusted according to the string-lines, the tapes on the alignment fixture amazingly indicated the same! Now it was simply a matter of adjusting each side equally ever so slightly so there was just about 1/16" total toe in.

I can hear the naysayers already... no way they would go through all this when you could simply take the car to an alignment shop and their "machine" is much more accurate. If you've ever actually watched an alignment being done, you know it is not rocket science and it is almost never perfectly on target, it is simply within the tolerances allowed.
 

billcu

Head Moderator
You'll hear no naysaying from me.:D

I've been doing my alignments for years. With all the parts I've changed, I've saved a lot of money, not to mention the time dropping off and picking up the car.

For the steering wheel position, after adjusting everything, I just get it the best I can by eye, then, take it for a test drive to see where it's at. Then I drive it back up on the turntables, with the steering wheel position where it was on the test drive, while driving straight. Both turntables will be at 0 degrees then, then I turn the steering wheel to center, and adjust the toe to bring the turntables back to that 0 degrees.

I often have to tweak the alignment again anyway, like you say, just being within tolerance isn't always the best.:)
 
Top