Blend Door Actuator Removal and Repair (Write-Up)

J

OCCUPY LoD :)
Well....I've been saying I was going to do this for awhile so here it is. Started on it at 10:00 this morning and got done at 12:30 (took a 30 minute break to talk to the Girl :)). Also repaired my blend door and replaced my cupholder/ash tray combo.


Step #1: First off....get your car where you want to work on it for about 90-120 minutes and then disconnect the battery. ALWAYS do this when working around the SRS systems (air bags).

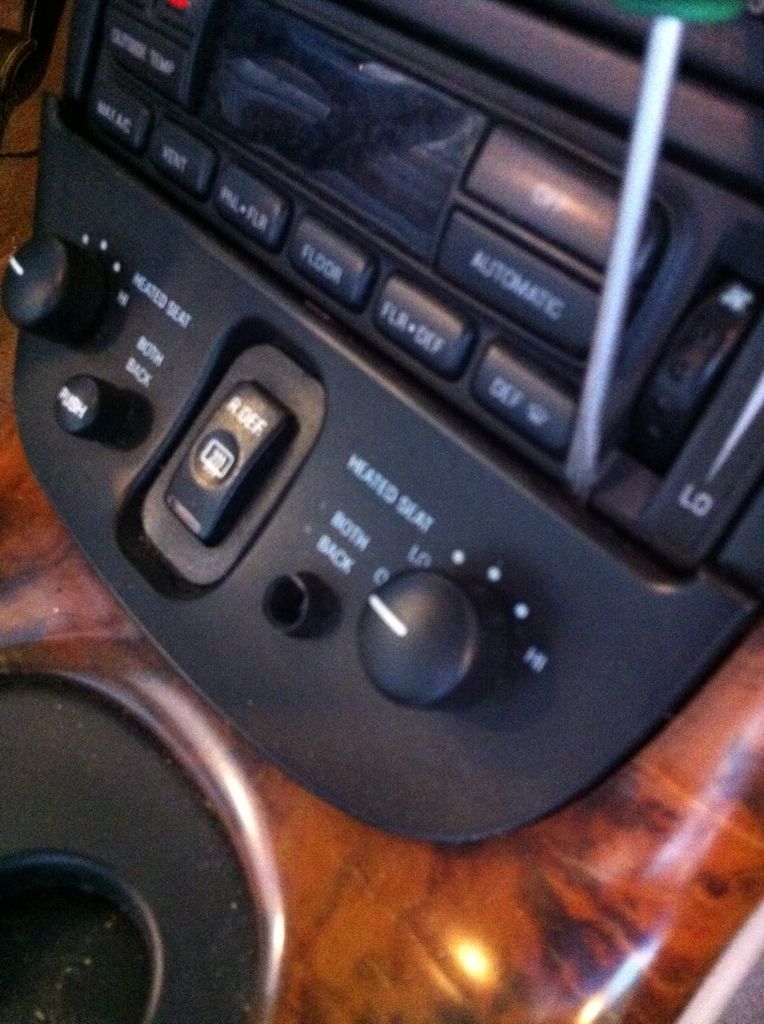
Step #2: Next start by removing the Lower Dash Bezel below the A/C Controls. On my particular car (1997 LSC Evergreen/Graphite), it has heated seats and the rear defroster controls.

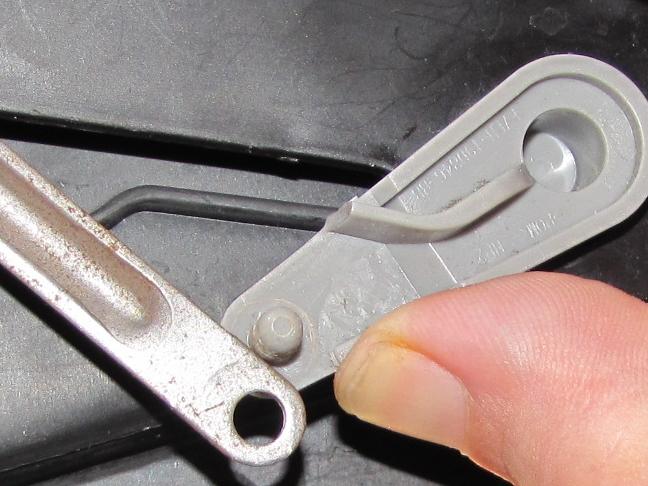
Using a small flat head screw driver, gently pry the top or sides to get enough panel to grap with your fingers. Pull towards the shifter to release the push in clips.


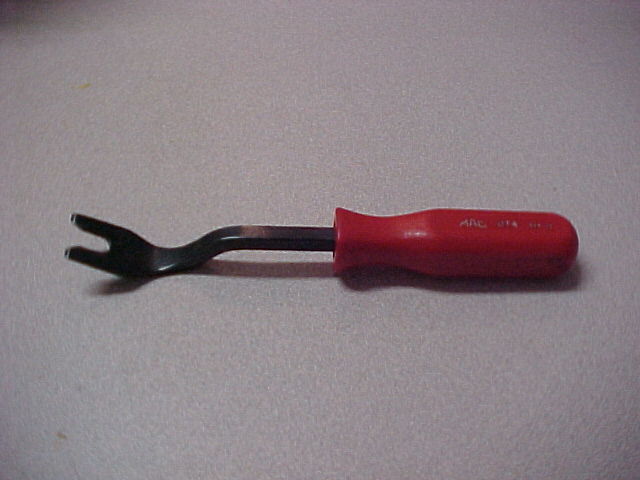
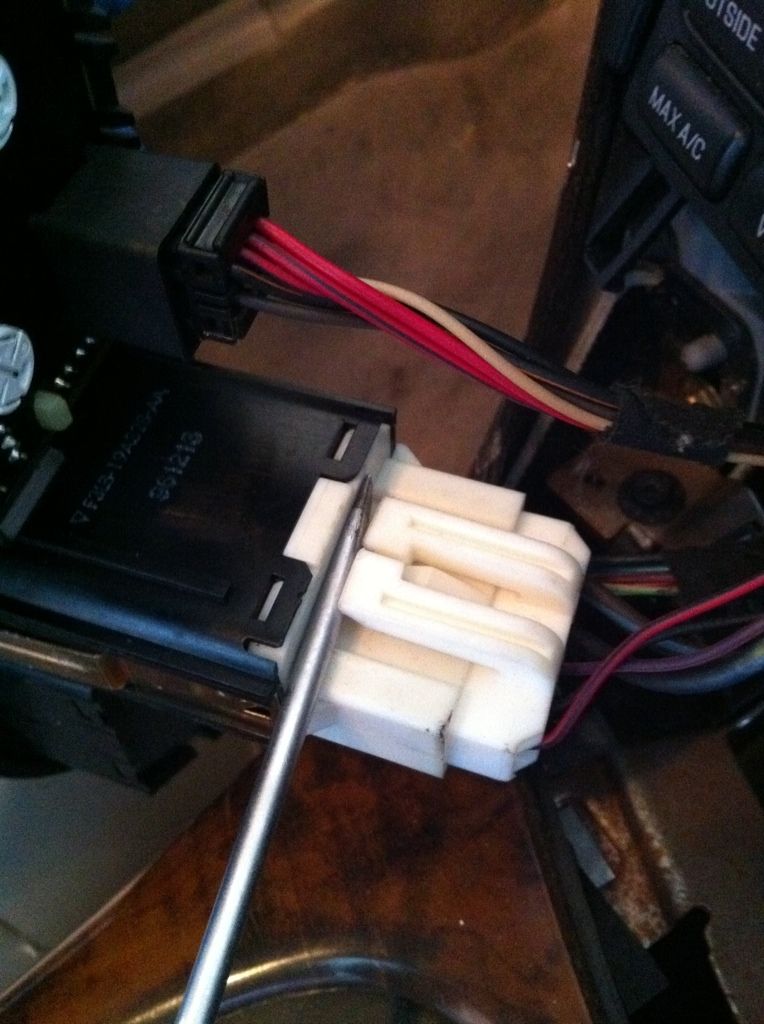
Unplug the controls. The defroster can be manipulated with a screw driver/prying action. The heated seats are a simple push down tab.


Step #3: Removing the above panel gains you access to the two black screws holding on the Radio Trim Bezel. Remove these screws and then pull the panel off by lifting back (towards shifter) around the stereo and up (towards the roof) by the shifter.


Once removed, you'll have to unplug the ground wire attached.


You can see the clips that hold the bezel in below.


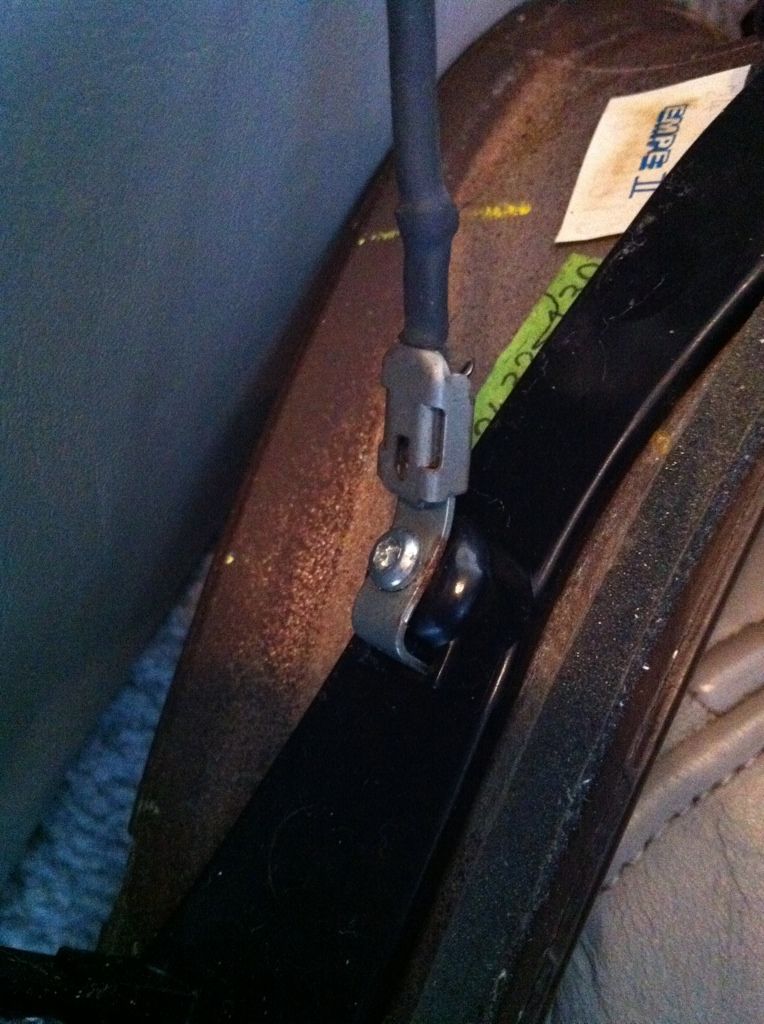
Step #4: Next we need to remove the shifter handle. There is a black sleeve just below the knob. You're going to slide this down to gain access to the torx screws holding the knob on.


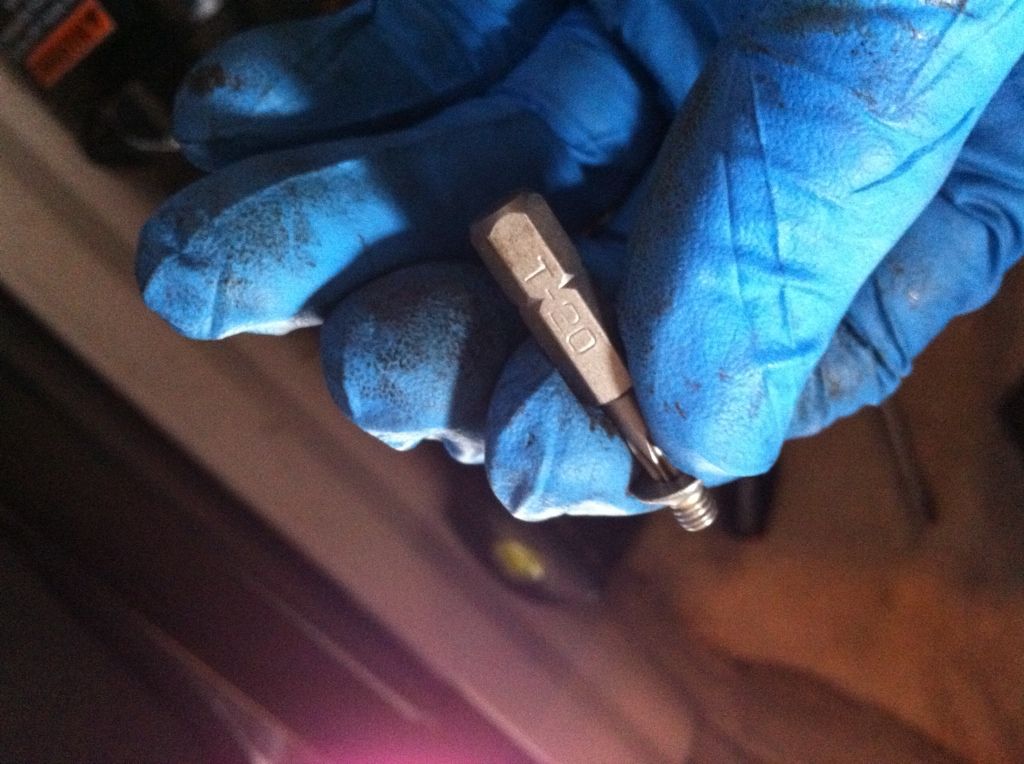
Once you've unscrewed these screws, you can lift the knob off. MAKE SURE you hold onto the button or it'll go flying....along with the spring. Once the knob is off you can remove the PRNDL (pronounced PRINDLE) Bezel and plastic slide cover.


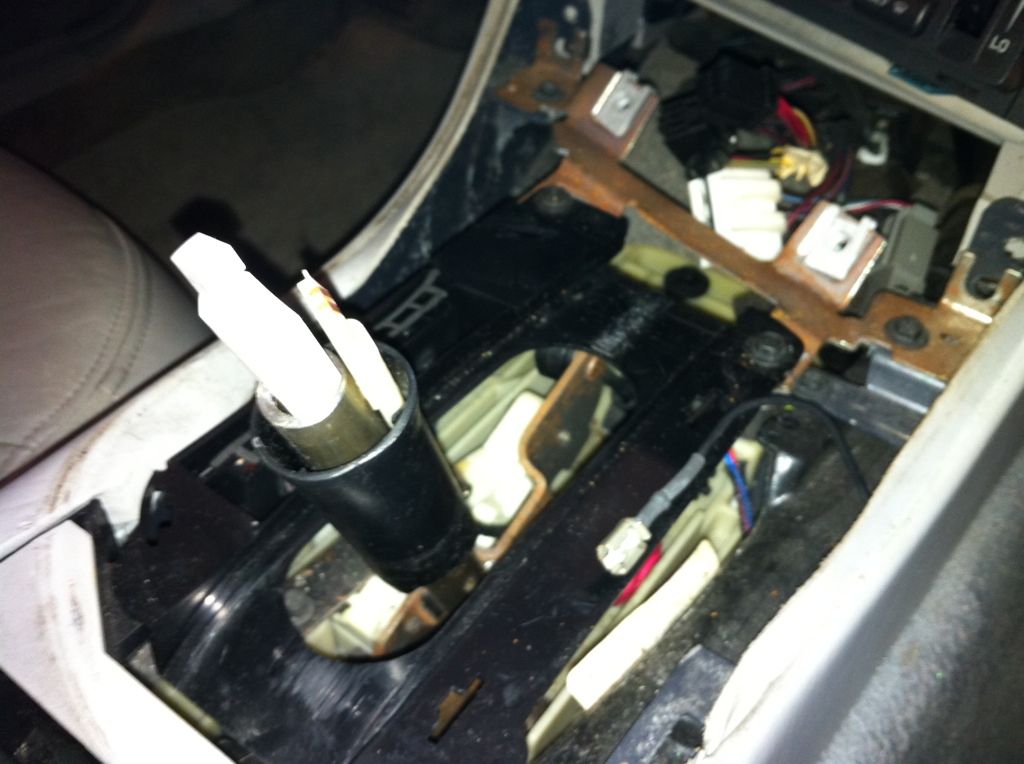
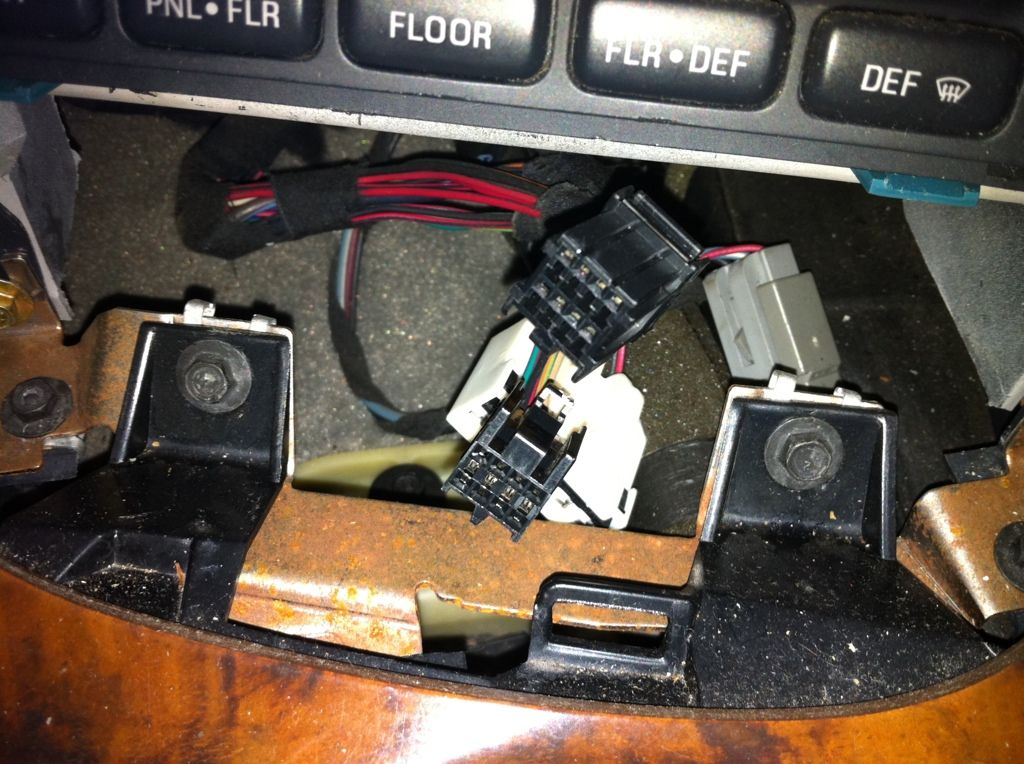
Step #5: Now that the shifter knob is removed lets remove the entire console. First you can remove the two gold bolts (see top right of picture and one on the other side) holding the console to the center of the dash.


Next open the console lid and remove all the contents, including the rubber mat at the bottom. This will give you access to the two gold screws holding down the back side.


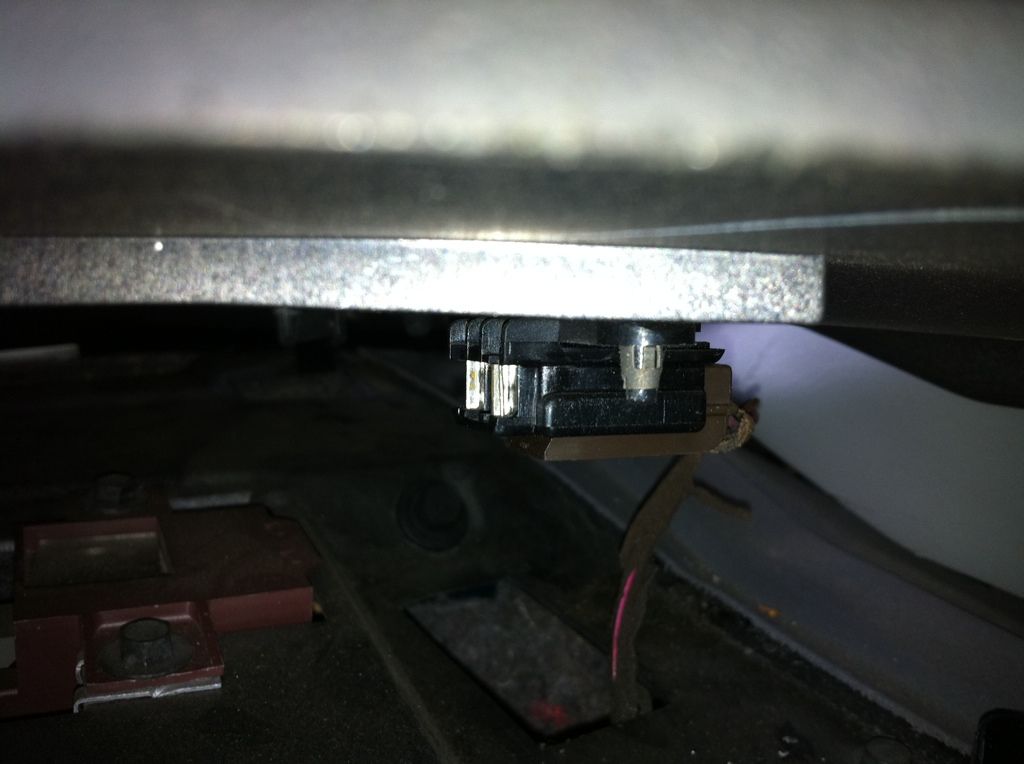
Now slide the console back towards the rear of the car and unplug the front connector using a screw driver.


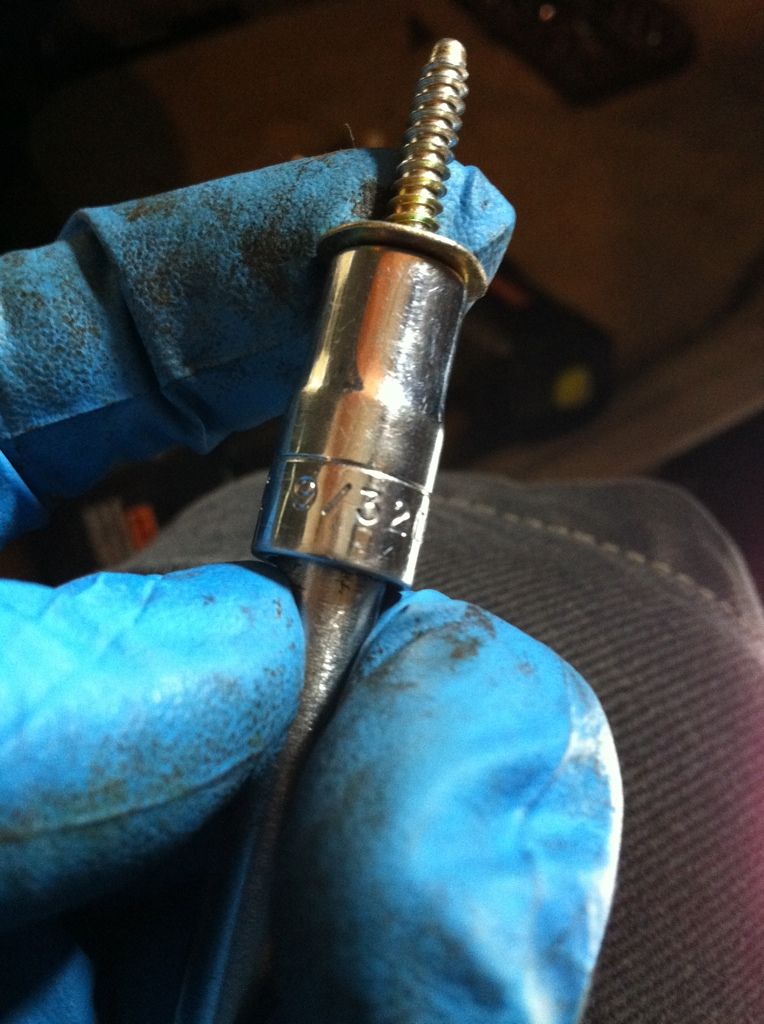
Once that is removed, lift up on the back of the console and unplug your old phone attachmments if you have them. The black connector is the push style and the antenna is a screw style similar to a Coax cable. Also unplug the long black connector on the PRNDL light socket by the shifter hole. Mine was already broken so it just pulled out, a small screw driver will help with yours.


Next, kick the damn cat out. :)


Step #6: Now that the console is out, we'll start removing the dash enough to work on the blend door. Using your fingers (or a small screw driver), lift up on the outside edge of the Top Dash Panel to begin removing it. Work your hand across and lift up towards the windshield. This comes off VERY easy.


Remove the connector on the Light Sensor located on the right side of the Top Dash Panel using a screw driver.


Next pull off the entire panel.


Kick out the cat...AGAIN. Haha, she turned on the hazard lights. :)


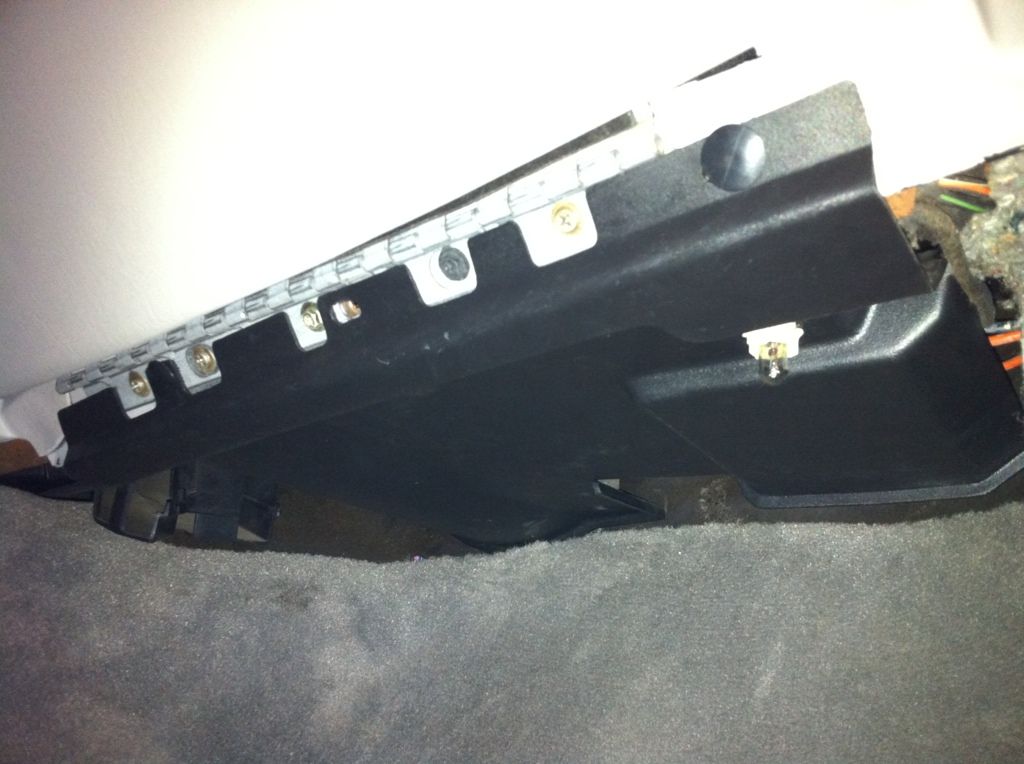
Once you've removed the top panel, you'll have access to the 6 bolts that hold the top of the dash to the firewall.


*************CONTINUED BELOW****************
 

J

OCCUPY LoD :)
Step #7: Remove the Glove Box, Kick Panel, and move the door sill and weather stripping.

First you'll need to remove the black Lower Plastic Panel by pulling it towards the seat and releasing the black push pins. Then unplug the light by twistiing counter-clockwise.


Open the Glove Box and remove the courtesy strap by sliding it down and pulling it out of its slot. Close the Glove Box.


Remove the three bolts (or screws like mine) on the bottom of the dash at the Glove Box Hinge.


Open the Glove Box and push in the "flaps" on both sides of the glove box to open it past its limits and remove it from dash.


Lift up on the Door Sill only enough to lift off the weather stripping. I peeled mine off enough to uncover the side of the dash and then flipped it over my open door.


Remove the Kick Panel by pulling towards the seat and releasing the white push pin. Then clip the Door Sill back in place so it's out of the way.


Repeat for the driver's side, being careful not to bend the Kick Panel as you move it around the Hood Release.


Step 8: Remove the Lower Dash Panels below the Steering Wheel and the metal box inside the dash. (My car did not have a black Lower Panel but yours should. Remove by pulling towards the seat and unplugging the light just like the passenger side.)

Once you've removed the black Lower Panel (if equipped), remove the two black screws holding on the panel below the Steering Wheel.


Pull the Panel off releasing its metal clips....and find a random wedding picture. :eek:


Locate the Wiper Delay Module (metal box with duct tape on it) and remove screw under dash.


Pull it out through the square hole and leave hanging.


Step #9: Locate all the lower bolts holding the dash on and remove. I used my electric impact gun for all the bolts on the car, except the blend door....


Starting on the passengerside, locate the large gold nut holding on the lower right portion of the dash. Remove.


Under the Radio and A/C Controls you'll find 2 nuts holding the center of the dash to the firewall. Locate and remove.


The use of a magnet helps.


Next locate the Metal Bracket in the shape of a "L" on the driver side of the center of the dash. Remove the 2 bolts.


Next locate and remove the other gold nut holding on the lower portion of the driver side of the dash.


Locate the black nut behind the Wiper Delay Module that you removed. This is in the square hole and can be seen with a flash light.


Lastly, remove the 6 bolts holding the top of the dash to the firewall (if you haven't already)


***********CONTINUED BELOW*************
 

J

OCCUPY LoD :)
Step #10: Ok, now that you've removed all the necessary bolts to slide the dash out, grasp the lower metal portion under the Steering Wheel and pull towards the seat. The dash will pop out about 3 inches.


Next pull on the lower part of the passenger side of the dash. The dash will come out a lot (5 or so inches) and may drop down a little bit. The main harness is the only thing preventing you from pulling out farther so don't worry about putting a little stress on it if you don't think it's been pulled out enough. I double checked everything behind the dash and its just the harness at the far right corner that is stopping it from coming out more.


With the Glove Box removed you can easily see the blend door.


Hand the cat your tools since she wants to help SO much. :eek:


Step #11: Remove the Blend Door Actuator. I had plenty of space to get my hands up there but the 1/2 turn with a 1/4" ratchet was not fun when I did my Dad's actuator so I opted on an Air Ratchet. I used a 1/2" to 1/4" adapter and the 9/32" socket. This left just enough room to remove the 4 bolts. I ran the Ratchet through the passenger side opening and operated it through the Glove Box to remove the top 2 bolts. Then I ran it under dash by the floor for the lower 2 bolts.


When removing the Actuator, DO NOT remove these two bolts. They provide access to the actual Blend Doors, which you don't need to do.


Once you've removed the 4 bolts, the Actuator will probably fall out. If not, just pull towards the dash. Unplug the white connector which is the push release kind. Take care removing the metal arm from the lower Blend Door Arm. My Dad's was broken and can be purchased at the dealer for 12 bucks. This just pulls out and snaps in.


Step #12: Replace the Actuator with the new one or REPAIR your already installed one and save some cash. In my case, my heat was working fine. Turns out, someone already repaired it AND "reinforced" it. :eek:


Since I didn't have a new arm (which cannot be bought separate from the Actuator) I had to repair mine. I used Super Glue to repair the crack by sticking it in a Vise and holding it shut.


Then using Jeremi's (Mad1stGen) idea, I dug up a Compression Fitting from my nuts and bolts stash and pushed it on. Perfect fit. I had to use a saws all to make a notch in the support piece and then shave off a little "nub" on the other side of the arm. Then the fitting slide right on with a little pressure.


Step #13: Modifying the Metal Arm to prevent your Blend Door Arms from breaking. Using a drill bit, "hone" out the hole on ONE end of the arm to make it kind of oblong.


Once you've drilled it out, make SURE you reinstall it onto the GRAY arm side. The Metal Arm does NOT have enough room to move if you put the slotted side onto the Black arm at the Actuator.


Step #14: Reinstall the Actuator. I had to install the black arm BEFORE the Actuator because the Blend Door was in the down position and had to be moved in order to mate with the Actuator. Both the Arm and the Actuator can be installed into each other one way only. My Dad's went right on but my Evergreen was kinda a pain. I installed the black arm WITH the Metal Arm attached so I could push up on it to open the Blend Door, then I pushed on the Actuator. You'll see what I mean. :)


Step #15: Reinstall the Dash. Lifting up from the same places you pulled out, just lift the dash back up and rest it on the two large studs on the far sides of the lower part of the dash (gold nuts you took off, remember?). Then push forward on the Steering Wheel and install the TOP DASH bolts first. Once you tighten them down, you can reinstall the rest of the bolts and nuts. Feel free to check the Blend Door Actuator functions before reinstalling all the panels and console. Switching from "Max A/C" to "Floor" will make the Actuator move positions. If it moves and you see the lower Gray Arm moving, you're golden. If not, remove and see what happened.

That's it. :)
 

J

OCCUPY LoD :)
Thanks to Mark for the Metal Arm Slot information.

By the way, here are some pics of the air trunk out of the car on my living room floor, with the blend door arms in full heat and full cool positions. It should be obvious what the problem is. The Ford engineers obviously forgot their basic geometry from school. I've got some steel bar of the correct dimensions and am going to make some corrected metal links if I can get off my lazy ass and pull out the milling machine.

Note that in the pics, I'm pushing fairly hard on each arm, with each one at its full stop.

Full heat:


Closeup:


Full cool:


Closeup:


Be aware that in the full cool position, the alignment is not an issue because the lower (gray) arm is not pressed against its stop. It's just hanging down a couple of degrees. It's only in the full heat position that the arms get stressed, which is why we see so many "I have no heat" posts around the beginning of winter but not so many "I have no AC" in the spring.

I'm tempted to say that the fix is as "simple" as making a new metal link with a shorter distance between holes, but I believe the best approach is to make the hole for the gray arm into a slot. That way the gray arm isn't under pressure in the event that the actuator pulls too hard in the cool position.
 

maxmk8

New member
Wow .... that is not an easy job... I thought there is an easier way of going through the message center... and it takes about 1/3 of the time? No?
 

Meister

New member
Awesome write up!

It seems that the Gen II's are plagued with this problem, does it also affect Gen I's?

Is it the same setup or did they change it and it became problematic in the Gen II's?

Doug
 

J

OCCUPY LoD :)
Wow .... that is not an easy job... I thought there is an easier way of going through the message center... and it takes about 1/3 of the time? No?
Nope, this IS the easy way. You can't even get your hand down there unless you slide the dash out a bit. You're the one that forwarded Jamie's little write-up email. :)

Awesome write up!

It seems that the Gen II's are plagued with this problem, does it also affect Gen I's?

Is it the same setup or did they change it and it became problematic in the Gen II's?

Doug
Thanks Doug. I've never heard of a Gen 1's blend door arm breaking. Apparently they only have one actuator/arm without the extra gray arm with the metal arm attachment.

I see how it is. J just wanted to increase his post count. :D
Haha noooo, I wanted to help everyone who searches "blend door". :)
 

billcu

Head Moderator
Nice write up, great photos!

I like the non metric tools.:)

I had to use some of those on my parts car.:)
 

SERGMARK

New member
Wow thats great Thanks:wave: I have the little heat problem and sounds like a soft squeak on the blend door. I need to do that on my 98 !
 

Roadboss

On Work Release
Man if I ever go into a Gen ll I know where I will be shipping it for a blend door mod. I'm a bleeder and my meat hooks are way to big for diggin in there. Nice write up.
 

Marked_Man

New member
Thanks for the great write up J...But one step too many...You don't need to remove the shifter handle to get the console out..;) Just thought I'd pass that on. BTW...Next time put a wrench in your cats paw.:D
 

Lefty

New member
actuator reinforcement

Thank you for the excellent write-up. You spent a great deal of time doing it and we appreciate it. So, here is my elementary question. I purchased a new F7LZ 19E616 AD and the ferrules to beef up the actuator arm, but I can't figure out how to get the actuator off so that I can put the lower ferrule on?? I don't want to do the wrong thing and break the dang thing as it cost $55. I do appreciate the fact that you can answer a simple question like this one without making the asker feel like an idiot. Thanks again. Lefty
 

J

OCCUPY LoD :)
Wirelessly posted (LOUD NOISES!: Mozilla/5.0 (iPhone; U; CPU iPhone OS 4_3 like Mac OS X; en-us) AppleWebKit/533.17.9 (KHTML, like Gecko) Version/5.0.2 Mobile/8F190 Safari/6533.18.5)

There are 4 bolts (screws?) that secure the actuator to the heater box. That's what I used the air ratchet and the 1/4 drive 5/32(?) socket for. If you HAVE removed those bolts, the actuator can get stuck in the heater box because the arm is most likely completely broken. Use a pry bar or long screw driver to pry the actuator away from the box. You'll probably end up with half the arm still attached to the actuator and the other half still stuck in the hole. (this happened to me when I replaced my Dad's)

MAKE SURE you get that extra piece out. I didn't have all my tools with me because I did a mobile repair so I didn't have my mini picking tools. What I did was use one of the gold console screws and stuck it in the hole and screwed it into the broken arm (via the convenient hole that is in ALL the arms) and it came right out.
 

rrudd2

Lurking....always Lurking
Thank you for the excellent write-up. You spent a great deal of time doing it and we appreciate it. So, here is my elementary question. I purchased a new F7LZ 19E616 AD and the ferrules to beef up the actuator arm, but I can't figure out how to get the actuator off so that I can put the lower ferrule on?? I don't want to do the wrong thing and break the dang thing as it cost $55. I do appreciate the fact that you can answer a simple question like this one without making the asker feel like an idiot. Thanks again. Lefty
I had the same issue this past weekend.

I just put it flat on my workbench and used a large screwdriver to gently pry it up a bit. Once it moved, I was able to pull it off by hand.
 

M Darrah

New member
Another option is to use an open end wrench just wide enough to fit around the shaft and pry it off with that. It's much more gentle than a screwdriver.
 
Top