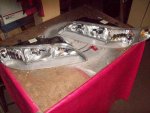
Headlight polishing

Jamesvinar

New member
Well mine are looking a little dirty but it's not on the outside. Is there a good way to get to the inside of the lens and sand/polish it?
 

tixer

Lincoln Evangelist
It's almost always all on the outside. Ive had very good luck with the 3m kit that most auto parts stores sell for about $25. It comes with a drill attachment, various grits of attachments, and some polishing compound. Works great.
 

beerdog

New member
If you really want it like new you need to recoat it after you polish it. Plus, you want it a little rough for the coating to stick. Jeremi gets his clear coated. There are UV cured coatings specifically designed for this. You need a good UV light that go for 100-200$. Doing it this way s how professionals refinish them. It will last years versus months. Some detail shops do this for a fee. You can read threads written by professionals on that autogeek website. Do this method right and they will be crystal clear.
 

Jamesvinar

New member
I will do the outside, maybe practice on my old housings first lol. I am sure there is some damage on the inside though, they leaked for a little bit and some of the moisture got the inside messed up, ill get some pics up later to describe it.
As for the clearcoat i do have some special coating for that. If i need to im guessing i would have to dremmel the housings open
 

tixer

Lincoln Evangelist
Pro tip: Remove the housings from the car, and remove the trim from the headlight, before polishing.

If you had a base model, I'd warn you that the chrome, on the chrome colored trim will come up with any masking tape. I don't think the LSC has this issue.

It makes things so much easier. Although you may have to find a clever way to clamp it down to a work surface.
 

ONLYTONY

New member
Gen 2 hdlt, not looking too good.jpgOn gen 2 that had moisture/water, the most damage is the bottom of the housings, dots. Can be repaired with Chrome Brite. Must sand the old chrome off before putting CB on. You can wipe the chrome SOFTLY with a dry rag, T-Shirt like, but be carefull you don't wipe the chrome off. NEVER USE ANYTHING WET, the chrome will rub off !!! Pic has bottoms sanded. I don't know your skill level, opening and repairing is not a couple hour job.
 

Jamesvinar

New member
Well I have multiple ovens at my disposal so I'll give it a shot, where would the points that I pry be at?

s-l1600.jpg

Hopefully this uploads alright but here's what i was talking about, did the usual job on the outside but some of the swirls and yellowing are on the inside
 

ONLYTONY

New member
Cook it slow warm oven 200-250 Start at large end, small end hooks in.. When sealant starts getting soft, you can try to pry. go easy. Gen 2'seem to pop off. Plastic clips have to be wedged to let lense unhook
 

steve

With "LOD" Since 1997
I used the SYLVANIA Headlight Restoration Kit and it comes with the UV clear coat to put on as the last step.


My 97 before and after


beerdog

New member
The coating is what really reates the clearity. BEsides beng permananent and protecting it fills in all the micro scratches that create the haziness.
 
Top